Mastering the Basics of Growing Autoflowers Outdoors
When it comes to growing autoflowers outdoors, realizing the fundamentals is crucial. Unlike their photoperiod counterparts, autoflowers don’t rely on light cycles to trigger flowering. This means they have a shorter growing period, making it even more essential to provide the right conditions from the start. If you want to maximize your harvest, you need to pay close attention to factors like location, sunlight, and soil preparation.
Finding the Perfect Spot for Your Autoflowers
Choosing the right location is one of the most important decisions you’ll make when growing autoflowers outdoors. The success of your grow depends heavily on where you plant. Your goal is to find a spot that offers optimal conditions for growth while minimizing the risks associated with outdoor growing.
First, consider sunlight. Autoflowers thrive in full sun, which means they need a location that receives at least 5-7 hours of direct sunlight each day. South-facing areas are ideal because they maximize exposure to the sun. However, if you live in a particularly hot climate, some afternoon shade can help protect your plants from heat stress.
Next, think about privacy and security. Cannabis plants can attract unwanted attention, so it’s wise to choose a location that’s not easily visible to passersby. Fencing, shrubs, or natural barriers can offer some privacy while still allowing your plants to get the light they need. Additionally, consider the proximity to water sources, as regular watering is essential for outdoor grows.
Finally, pay attention to the microclimate of your chosen spot. Areas that are sheltered from strong winds and sudden temperature drops will help your plants stay healthy and resilient. A little extra effort in choosing the right location can set you up for a successful grow season.
Maximizing Sunlight for Optimal Growth
Sunlight is the lifeblood of any outdoor grow, and this is especially true for autoflowers. These plants have a short lifecycle, which means every day counts. To get the most out of your grow, you need to ensure your plants receive adequate light from the moment they sprout.
Begin by observing the path of the sun at your chosen location. In the northern hemisphere, a south-facing slope or flat area generally receives the most consistent sunlight throughout the day. If possible, check the area at various times to spot any shadows that may limit light exposure.
If you live in a region with intense summer heat, consider a location that gets morning sunlight but some shade in the hottest part of the afternoon. This can help prevent heat stress, which can stunt growth and reduce yields. On the other hand, if your climate is cooler, full sun all day will help your plants reach their full potential.
Remember, the quality of light is just as important as the quantity. Clean any nearby obstructions like overhanging branches or other plants that might block sunlight. Reflective surfaces like light-colored walls or fences can also help increase the amount of light your plants receive. When growing autoflowers outdoors, proper sunlight management is key to maximizing growth and yields.
Preparing Your Outdoor Soil for Success
Soil is the foundation of any successful grow, and when you’re growing autoflowers outdoors, preparing your soil properly is essential. Unlike indoor grows, where you can control every aspect of the environment, outdoor soil requires careful preparation to ensure your plants have the nutrients they need throughout their lifecycle.
Start by testing your soil’s pH. Autoflowers prefer a slightly acidic soil with a pH between 6.0 and 7.0. You can easily test your soil with a pH meter or testing kit, both of which are readily available at gardening stores. If your soil is too acidic or alkaline, you’ll need to amend it accordingly. Lime can raise pH, while sulfur or peat moss can lower it.
Next, focus on the soil structure. Good soil should be well-draining but still retain enough moisture to keep your plants hydrated. If your soil is too sandy, it might drain too quickly, causing your plants to dry out. Conversely, heavy clay soils can retain too much water, leading to root rot. Amending your soil with organic matter like compost or aged manure can improve both drainage and moisture retention, making it ideal for growing autoflowers outdoors.
Finally, enrich your soil with nutrients. Autoflowers have a shorter growth cycle, so they need a steady supply of nutrients right from the start. A balanced organic fertilizer that provides nitrogen, phosphorus, and potassium (NPK) is essential. You can also mix in slow-release amendments like bone meal or fish meal to provide a constant nutrient supply. Proper soil preparation is critical to ensuring your autoflowers thrive and produce the best possible yields.
Promos & Deals
Best Practices for Planting Autoflowers Outdoors
Once you’ve prepared your soil and chosen the perfect spot, it’s time to get your plants in the ground. Planting autoflowers outdoors requires careful attention to detail, especially during the germination and seedling stages. Following these best practices will help you start your plants off on the right foot, setting the stage for a successful grow.
Germinating and Caring for Seedlings
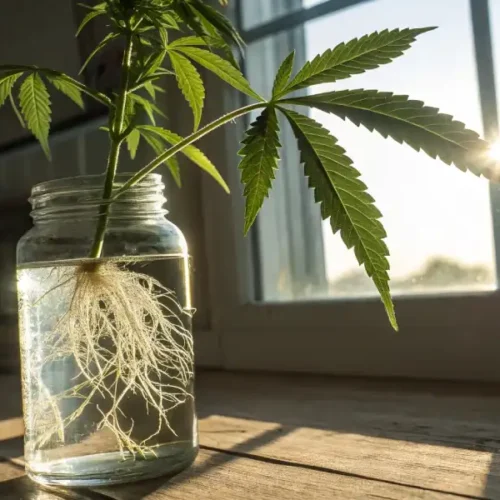
Germination is the first and most crucial step in growing autoflowers outdoors. It’s the process where seeds sprout and develop into seedlings, and it sets the tone for the entire grow. To ensure a high germination rate, it’s important to provide the right conditions from the start.
Begin by selecting high-quality seeds from a reputable supplier. Autoflowering seeds are more forgiving than photoperiod strains, but starting with strong genetics gives you the best chance of success. There are several methods to germinate seeds, but the paper towel method is one of the most reliable. Place your seeds between two damp paper towels and keep them in a warm, dark place. Within a few days, you should see roots begin to emerge.
Once your seeds have sprouted, it’s time to plant them in your prepared outdoor soil. Autoflowers are sensitive to transplant shock, so it’s best to plant them directly in their final location rather than starting them in small pots. Make sure the soil is moist but not waterlogged, and plant the seeds about half an inch deep with the root facing downward.
During the seedling stage, your plants are delicate and need special care. Protect them from harsh sunlight, wind, and pests by using a cloche or light covering if necessary. Water lightly to keep the soil consistently moist but avoid overwatering, as this can lead to damping-off, a fungal condition that can kill young plants. Proper care during the germination and seedling stages is critical to growing strong, healthy autoflowers outdoors.
Timing Your Planting for Maximum Growth
Timing is everything when it comes to planting autoflowers outdoors. Unlike photoperiod strains that rely on seasonal changes in light to flower, autoflowers will start their flowering cycle based on their internal clock, usually within 2-4 weeks of germination. This means you need to plan your planting schedule carefully to align with the best outdoor conditions.
In most regions, the best time to plant autoflowers outdoors is in late spring, after the last frost date. This ensures that your plants have the warm temperatures they need for vigorous growth during their short vegetative period. However, because autoflowers have such a fast lifecycle, you can stagger plantings throughout the growing season to harvest multiple crops. Planting every few weeks from late spring through midsummer can give you a steady supply of fresh buds.
If you live in a region with a longer growing season, you might be able to squeeze in an extra harvest by planting early in the spring and again in late summer. Just be sure to avoid planting too late in the season, as cooler temperatures and shorter days in the fall can slow down growth and reduce yields.
Proper timing is essential to making the most of your outdoor grow. By planning your planting schedule carefully, you can ensure that your autoflowers have the ideal conditions for every stage of their development.
Transplanting Your Seedlings to Outdoor Conditions
Once your seedlings have developed a few sets of true leaves, they’re ready to be planted directly in their final outdoor location. Avoid transplanting to reduce stress on the plant; instead, plant them directly in the soil where they will grow to maturity.
Before planting, harden off your seedlings by gradually exposing them to outdoor conditions. Start by placing them outside for a few hours each day, gradually increasing the time they spend outdoors over the course of a week. This helps them acclimate to the wind, sunlight, and temperature fluctuations they’ll experience in their final location.
When you’re ready to plant, choose a cool, cloudy day or plant in the early morning or late afternoon to minimize stress. Carefully dig a hole in your prepared soil that’s large enough to accommodate the seedling’s root ball. Gently place the seedling in the hole, backfill with soil, and water thoroughly to help the roots establish.
After planting, monitor your plants closely for signs of stress, such as wilting or yellowing leaves. Provide shade if necessary during the first few days to help them adjust. With careful attention, your seedlings will quickly take root and begin to thrive in their outdoor environment, setting the stage for a successful grow season.
Managing Water and Nutrients for Outdoor Autoflowers
Once your autoflowers are settled into their outdoor location, the next critical step is managing water and nutrients. Autoflowers are known for their resilience and ease of growth, but they still require proper care to reach their full potential. By mastering watering techniques and providing the right nutrients, you can ensure your plants stay healthy and productive throughout their lifecycle.
Watering Techniques for Outdoor Grows
Watering might seem straightforward, but it’s one of the most important aspects of growing autoflowers outdoors. Too little water can stunt growth and lead to nutrient deficiencies, while too much can drown the roots and cause rot. Striking the right balance is key to healthy plants.
Autoflowers have a shallow root system compared to photoperiod strains, so they require more frequent watering, especially during hot and dry conditions. However, it’s crucial to avoid overwatering. The best approach is to water deeply but less frequently, allowing the soil to dry out slightly between waterings. This encourages the roots to grow deeper, seeking out moisture and becoming more resilient.
In outdoor grows, the weather plays a significant role in determining your watering schedule. During hot spells, you may need to water daily or every other day, while cooler, wetter periods might require less frequent watering. Always check the soil moisture before watering by sticking your finger a few inches into the soil. If it feels dry at that depth, it’s time to water.
Morning is the best time to water your plants, as it gives them the moisture they need to power through the day while minimizing the risk of fungal infections that can occur when plants stay wet overnight. Consistent, well-timed watering is essential for growing robust autoflowers outdoors.
Organic Nutrient Options for Outdoor Plants
Feeding your autoflowers the right nutrients is crucial for maximizing growth and yield. While synthetic fertilizers can be effective, many outdoor growers prefer organic options that enrich the soil while providing a steady, natural nutrient supply. Organic nutrients also support the soil’s microbial life, which plays a vital role in breaking down organic matter and making nutrients available to your plants.
Compost is one of the best organic fertilizers you can use for growing autoflowers outdoors. It provides a balanced mix of nutrients and improves soil structure, promoting healthy root development. You can make your own compost or purchase it from a garden center. Apply a layer of compost around the base of your plants or mix it into the topsoil to feed them throughout the growing season.
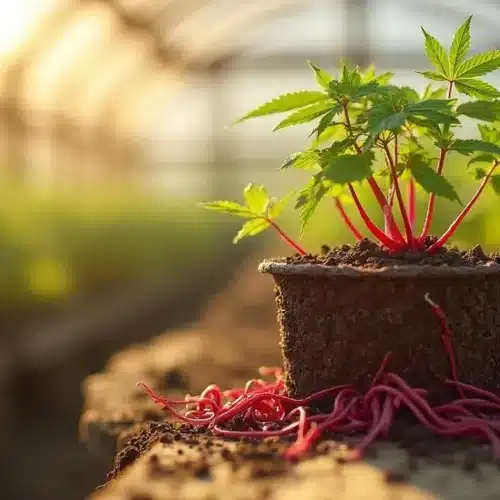
Worm castings are another excellent organic nutrient source. Rich in nitrogen, phosphorus, and potassium, they provide a gentle yet effective feed that won’t burn your plants. Incorporate worm castings into your soil at the start of the season or use them as a top dressing during the growth cycle.
Other organic options include fish emulsion, bone meal, and kelp meal. These slow-release fertilizers provide a steady stream of nutrients as they break down in the soil. When choosing organic nutrients, aim for a balanced mix that includes all the essential macronutrients nitrogen (N), phosphorus (P), and potassium (K) as well as micronutrients like calcium, magnesium, and sulfur.
Organic feeding not only benefits your plants but also improves the overall health of your soil, making it better for future grows.
Dealing with Rain and Moisture in Outdoor Grows
While watering is essential, managing natural moisture from rain is equally important when growing autoflowers outdoors. Too much rain can lead to waterlogged soil, which in turn can cause root rot and other moisture-related issues. On the other hand, a lack of rain during dry spells can stress your plants and reduce yields.
To protect your plants from excessive rain, consider using raised beds or planting on a slight slope, which helps excess water drain away from the roots. Mulching around the base of your plants can also help by retaining moisture during dry periods while preventing the soil from becoming too saturated when it rains. Straw, wood chips, or even grass clippings can make effective mulch.
If you live in an area with frequent heavy rains, covering your plants with a tarp or building a simple rain shelter can prevent waterlogging. Just be sure to remove the cover when the rain stops to allow your plants to get plenty of sunlight and fresh air.
During extended dry spells, you’ll need to supplement rainfall with additional watering. Pay close attention to your plants and adjust your watering schedule based on the weather conditions. Consistent moisture management is crucial for keeping your autoflowers healthy and ensuring they produce a bountiful harvest.

Protecting Your Outdoor Autoflowers from Pests and Weather
Outdoor growing offers many advantages, but it also exposes your plants to potential threats from pests and extreme weather. Taking proactive steps to protect your autoflowers is essential for a successful grow. By using natural pest control methods and preparing for unpredictable weather, you can safeguard your plants and maximize your yields.
Natural Pest Control Methods
Pests are one of the biggest challenges when growing autoflowers outdoors. Common culprits include aphids, spider mites, caterpillars, and slugs, all of which can damage your plants and reduce yields. However, there are several natural pest control methods that can help keep these invaders at bay without resorting to harmful chemicals.
One of the most effective ways to deter pests is by encouraging beneficial insects that prey on common cannabis pests. Ladybugs, lacewings, and predatory wasps can all help keep pest populations under control. You can attract these beneficial insects by planting companion plants like marigolds, dill, and cilantro around your grow area.
Neem oil is another powerful tool in your pest control arsenal. Derived from the neem tree, this organic oil acts as both a repellent and a mild insecticide, deterring pests and disrupting their life cycles. Apply neem oil as a foliar spray, coating the leaves and stems of your plants to prevent infestations.
For ground-dwelling pests like slugs and snails, consider using diatomaceous earth. This natural powder is made from fossilized algae and is safe for plants but deadly to pests with exoskeletons. Sprinkle it around the base of your plants to create a barrier that slugs and snails won’t want to cross.
By integrating these natural pest control methods into your outdoor grow, you can protect your autoflowers from damage and ensure a healthy, productive season.
Shielding Your Plants from Extreme Weather
Weather is unpredictable, and extreme conditions can pose a significant risk to your outdoor autoflower seeds. From unexpected cold snaps to scorching heatwaves, being prepared for whatever nature throws your way is crucial for a successful grow.
In regions where temperatures can drop unexpectedly, frost is a major concern. Even a brief frost can damage or kill your plants, so it’s important to take precautions. If a frost is forecasted, cover your plants with a frost cloth, old sheets, or even cardboard boxes overnight. These coverings trap heat from the soil and protect your plants from freezing temperatures.
On the opposite end of the spectrum, extreme heat can stress your plants, causing wilting and reduced growth. During a heatwave, make sure your plants are well-watered and consider providing some temporary shade during the hottest part of the day. A shade cloth or even an old bed sheet draped over the plants can help reduce heat stress.
Strong winds are another weather challenge for outdoor growers. Winds can break branches, uproot young plants, and dry out the soil. If you’re growing in a windy area, consider using windbreaks like fences, hedges, or even strategically placed tarps to protect your plants.
By staying vigilant and prepared for extreme weather, you can protect your autoflowers from damage and ensure they have the best chance to thrive, no matter the conditions.
Companion Planting to Deter Pests and Boost Growth
Companion planting is a time-tested gardening technique that involves growing certain plants together to enhance growth, deter pests, and improve soil health. When growing autoflowers outdoors, companion planting can be a valuable tool for improving your overall grow.
Some plants naturally repel pests that might otherwise target your cannabis. For example, marigolds are known to deter aphids and other insects, while basil can repel mosquitoes and flies. Planting these companions around your autoflowers can create a natural barrier against pests, reducing the need for chemical interventions.
Other companion plants can improve soil health by fixing nutrients or attracting beneficial insects. Clover, for example, fixes nitrogen in the soil, providing an essential nutrient for your cannabis plants. Herbs like dill and cilantro attract predatory insects that prey on common cannabis pests, helping to keep your garden pest-free.
Companion planting can also improve the microclimate around your plants. Taller plants like sunflowers can provide shade during the hottest part of the day, helping to protect your autoflowers from heat stress. Additionally, ground cover plants like clover or creeping thyme can help retain soil moisture and reduce erosion.
By incorporating companion plants into your outdoor grow, you can create a more resilient, self-sustaining garden that supports healthy cannabis growth and reduces the impact of pests and harsh weather.
Harvesting and Curing Autoflowers Grown Outdoors
After weeks of care and attention, the time will come to harvest your outdoor autoflowers. Proper harvesting and curing are essential to ensure that all your hard work pays off with potent, flavorful buds. Rushing through these final steps can result in a subpar product, so it’s important to approach them with the same care you’ve given throughout the growing season.
Recognizing the Perfect Time to Harvest
Timing your harvest correctly is critical for maximizing potency and flavor. Harvest too early, and your buds might not reach their full potential; wait too long, and they could lose some of their potency. Knowing when to harvest is both an art and a science.
One of the most reliable ways to determine the right time to harvest is by examining the trichomes on your buds. These tiny, crystal-like structures contain the majority of the cannabinoids and terpenes that give cannabis its effects and flavor. Using a magnifying glass or a jeweler’s loupe, closely inspect the trichomes. When they are mostly cloudy with a few turning amber, your plants are at peak potency and ready to be harvested.
The pistils (the hair-like structures on the buds) are another indicator of ripeness. Initially, these pistils are white and upright, but as the plant matures, they will darken and curl inward. When about 70-80% of the pistils have changed color, it’s a good sign that your autoflowers are ready to harvest.
Environmental factors can also influence the timing of your harvest. If the weather is turning colder or wetter, it may be necessary to harvest a bit earlier to avoid mold or frost damage. Conversely, if the weather is stable, you might allow your plants a few extra days to fully mature.
Proper timing ensures that you capture your plants at their peak, resulting in the most potent and flavorful buds possible.
Techniques for Harvesting Outdoor Autoflowers
Once you’ve determined that your autoflowers are ready for harvest, it’s time to get to work. Harvesting is a straightforward process, but it’s important to do it correctly to avoid damaging your buds.
Start by preparing your tools. Sharp scissors or pruning shears are essential for clean cuts, which help prevent damage to the buds and stems. Make sure your tools are clean and sterilized to prevent any contamination.
Begin by removing the large fan leaves. These leaves don’t contain much THC and can be discarded or composted. Removing them first makes it easier to handle the buds during the trimming process.
Next, cut the main stem at the base of the plant. You can choose to harvest the entire plant at once or cut individual branches, depending on the size of the plant and your workspace. Hang the branches upside down in a cool, dark, and well-ventilated area to begin the drying process.
During the drying phase, it’s important to maintain proper environmental conditions. Aim for a temperature of 60-70°F (15-21°C) and a relative humidity of 50-60%. This allows the buds to dry slowly, preserving their potency and flavor while preventing mold growth. The drying process typically takes about 7-10 days.
After the initial drying, your buds will be ready for trimming. Use sharp scissors to carefully trim away the remaining sugar leaves (the small leaves close to the buds). These leaves can be saved for making edibles or concentrates, as they still contain some cannabinoids.
Perfecting the Drying and Curing Process for Maximum Potency
Curing is the final step in preparing your cannabis for consumption, and it’s arguably the most important. Proper curing enhances the flavor, smoothness, and potency of your buds, making all the difference between good and great cannabis.
Once your buds are dry, place them in airtight glass jars for curing. Fill the jars about 75% full to allow for some airflow but avoid overpacking, as this can lead to mold. Store the jars in a cool, dark place.
During the first week of curing, open the jars (a process known as “burping”) for about 10-15 minutes each day to allow excess moisture to escape and fresh air to enter. This helps prevent mold and ensures even curing. After the first week, you can reduce the frequency of burping to once every few days.
Curing should last for at least two weeks, but longer curing (up to six weeks or more) can further enhance the quality of your buds. As the chlorophyll breaks down, the harshness of the smoke decreases, and the flavors and aromas intensify.
Properly cured buds will have a smooth, flavorful smoke, with enhanced potency and aroma. By taking the time to cure your autoflowers correctly, you ensure that all your hard work results in the best possible product.
Maximizing Yields with Outdoor Autoflowers
Growing autoflowers outdoors offers the potential for excellent yields, but maximizing those yields requires careful planning and attention to detail. By implementing training techniques, managing soil moisture, and extending the growing season, you can boost your plants’ productivity and enjoy a bountiful harvest.
Effective Training Techniques for Autoflowers
Training techniques are often used to increase yields by encouraging plants to grow in a way that maximizes light exposure to all parts of the plant. While traditional training methods like topping and fimming are less common with autoflowers due to their short lifecycle, there are other techniques that can be highly effective.
Low-Stress Training (LST) is one of the best methods for autoflowers. LST involves gently bending and tying down the branches to create a more even canopy, allowing more light to reach the lower buds. This can significantly increase your yields by promoting more even growth and reducing the dominance of the main cola.
To perform LST, start when your plants are still young and flexible, usually within the first few weeks of growth. Use soft plant ties or garden wire to carefully bend the main stem and side branches, securing them in place. As the plant grows, continue to adjust the ties, spreading out the branches to maintain an even canopy.
Another technique, known as defoliation, involves selectively removing some of the larger fan leaves to improve light penetration and airflow. Be cautious with this method, as autoflowers are more sensitive to stress due to their short lifecycle. Only remove leaves that are blocking light from reaching lower buds, and avoid over-defoliating.
These training techniques, when done correctly, can help you maximize the potential of your outdoor autoflowers, leading to larger, more consistent yields.
Using Mulch to Conserve Soil Moisture
Maintaining consistent soil moisture is key to healthy growth and high yields, especially in outdoor grows where the weather can be unpredictable. One of the most effective ways to manage soil moisture is by using mulch around your plants.
Mulch acts as a protective layer that helps retain moisture in the soil by reducing evaporation. It also insulates the soil, keeping the roots cooler during hot weather and warmer during cooler spells. Organic mulches, such as straw, wood chips, or shredded leaves, are particularly beneficial because they also break down over time, adding nutrients to the soil.
To mulch your autoflowers, apply a 2-4 inch layer of organic material around the base of the plants, leaving a small gap around the stem to prevent rot. This simple step can make a big difference in conserving moisture, reducing the frequency of watering, and improving the overall health of your plants.
In addition to moisture retention, mulch also helps suppress weeds, which can compete with your plants for water and nutrients. By keeping the soil around your autoflowers covered and protected, you create an environment where your plants can thrive, leading to higher yields at harvest.
Extending the Growing Season for Multiple Harvests
One of the unique advantages of growing autoflowers outdoors is the ability to fit multiple harvests into a single growing season. Unlike photoperiod strains that depend on changing light cycles, autoflowers will flower based on their age, allowing you to plan staggered plantings and maximize your outdoor space.
To extend your growing season, start your first crop as soon as the risk of frost has passed in the spring. Depending on your climate, you may be able to harvest your first crop by early summer. After the first harvest, prepare the soil and plant a second crop. If your growing season is long enough, you can even fit in a third crop before the weather turns cold.
Staggered planting not only increases your total yield but also spreads out the workload, making it easier to manage your garden throughout the season. By planning your planting schedule carefully and making the most of your growing season, you can enjoy multiple harvests of fresh, potent buds.
Growing autoflowers outdoors offers a rewarding experience with the potential for great yields. By applying the techniques and strategies outlined in this guide, you can maximize your success and enjoy the fruits of your labor with each harvest.