How to Grow Autoflowering Outdoor Seeds

In this guide, we are going to show you the best tricks and a step-by-step guide on how to grow autoflowering marijuana outdoors because many growers think that autoflowering cannabis seeds can only be grown indoors. However, that is not the case. Quite the contrary, with autoflowering weed seeds, you can achieve great results in your outdoor crops.
Autoflowering weed seeds are easy to grow and suitable for both expert growers and novice or intermediate growers, all benefiting from beautiful harvests that deliver powerful buds that leave everyone floating in the air. For this reason, we have prepared this guide for you—whether you’re growing indoors or interested in growing autoflowers outdoors—so that you can grow your autoflowering marijuana plants in a big way.
Recommended Strains

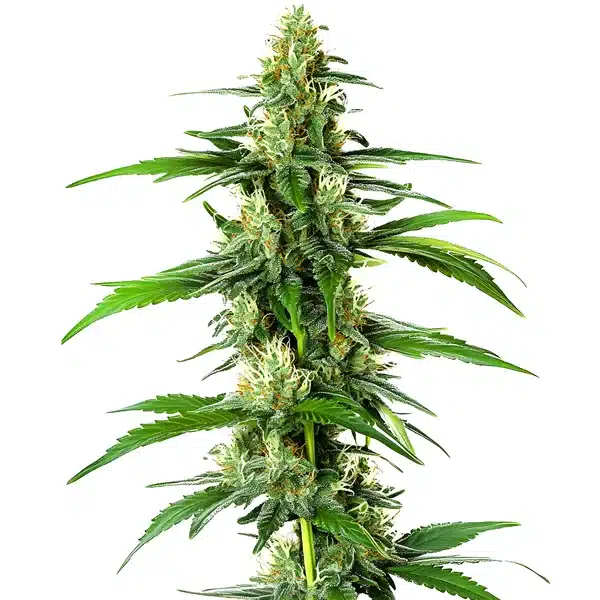
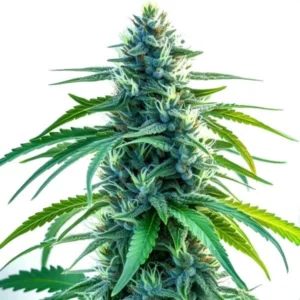
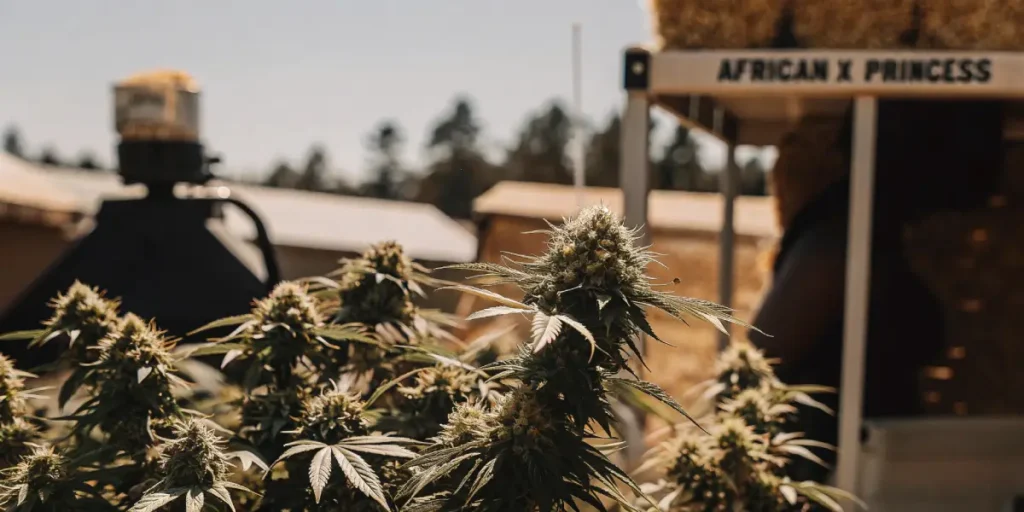
African x Princess 88
|
|
THC | 18% - 20% (Medium) |
|
|
Type | Feminized |
|
|
Yield | High |
|
|
Phenotype | 40% Indica / 60% Sativa |
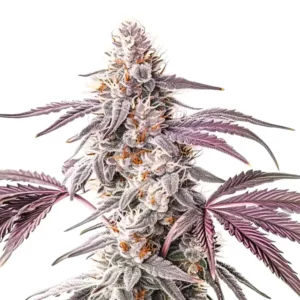
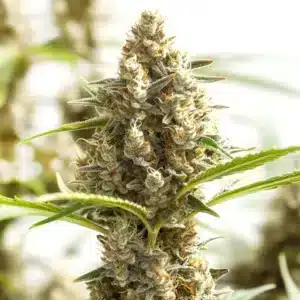
South African
|
|
THC | 18% - 20% (Medium) |
|
|
Type | Feminized |
|
|
Yield | High |
|
|
Phenotype | 10% Indica / 90% Sativa |
Step by step to growing autoflowering marijauana plants outdoors
This is a step by step guide for how to grow autoflowering marijuana outdoors. Here, you must pay attention to each of the steps that we give you because they are fundamental for the complete cultivation process from sowing the seed to harvesting the autoflowering weed plant.
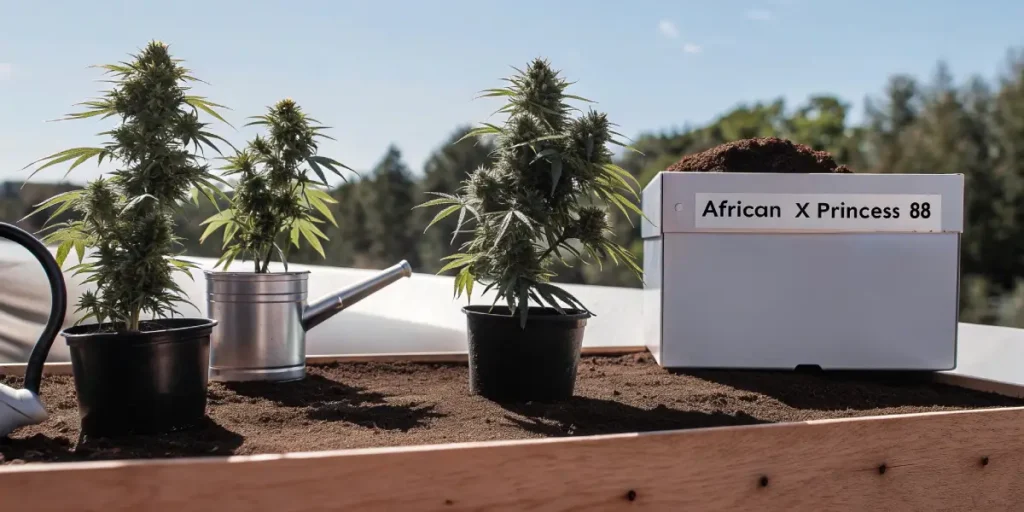
When growing autoflowering cannabis, selecting the right strain is key to achieving the best results. Some strains, such as African x Princess 88, offer unique characteristics that can significantly enhance your harvest.
1. Choose the growing season well.
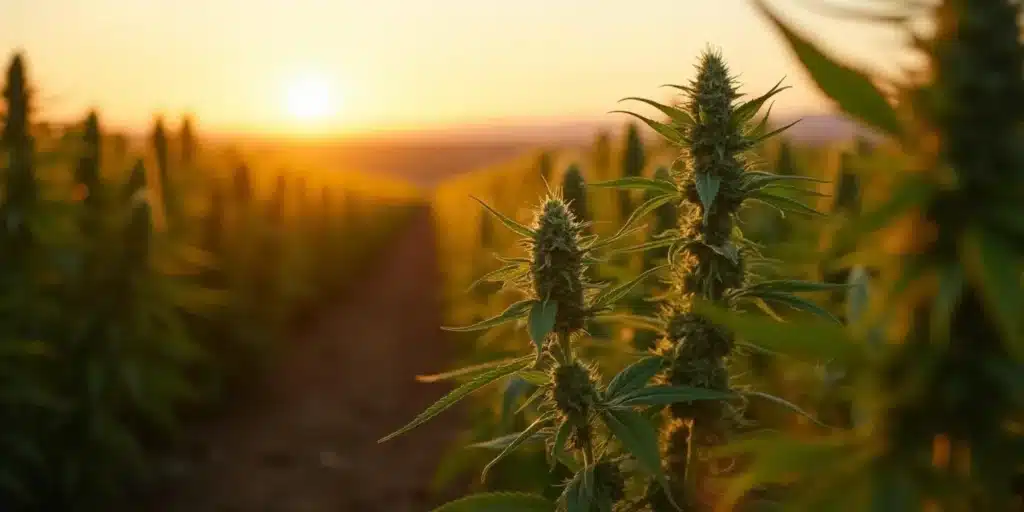
It is an obvious matter that cannabis plants like the sun and good temperatures. For this reason, the first step we must take is selecting the growing season. Summer is the best time to grow autoflowering cannabis varieties outdoors.
To ensure a great crop, you can start in mid-spring or late spring, depending on the climate where you want to grow. For example, in Mediterranean climates such as Spain or the west coast of the USA in the California area, you can start your crop in mid-April or early May. So, if you leave around these dates, you make sure you don’t have problems with the rains at the end of winter and also that your cannabis plants are able to develop to their maximum in the summer time when the daylight hours are more intense as well as the temperatures, making your plants produce great buds.
2. Selection of soil
The selection of the substrate is essential. As we always recommend, use an aerated substrate with a good amount of nutrients that allows the development of the roots of the plant. Avoid clay substrates that stop the optimal growth of the roots. Surely, in your grow shop, you will find a substrate according to your budget that meets your needs.
3. Perfect pot to grow marijuana outdoors
Selecting the right pot is important because the roots and the plant develop in it. We recommend using 7L pots to have small, very compact plants, especially for terraces, balconies, or for mixed cultivation. In case you want to grow autoflowering strains of XL or XXL size, it is good to use larger 11L pots because you will be able to obtain larger plants due to their broader and more forceful development.
4. Good light
Well, since we now grow outdoors, the best thing is to fit the peak summer season where there are the most sunlight hours and the best temperatures so that the plant develops in maximum splendor. Thus, if autoflowering plants are grown at the end of April or at the end of May, they will begin to flower to be harvested at the end of July, soaking up as many hours of light as possible during the peak summer dates.
All of the above provides the possibility that at the end of the growth phase of the autoflowering cannabis plants that you have in the crop, you can start with a new litter of plants which will begin to bloom when you are harvesting your first crop of the season. In other words, you manage to have two harvests of automatic varieties in the same growing season, a matter of vital importance to never lose the reserves of good marijuana cultivated by your hands.
5. Irrigation
Irrigation is essential, so you must check the substrate where you are growing every day to know if it is dry or wet. That is why a well-aerated soil is important so that the water filters in a good way and reaches all the roots. You can use a soil moisture meter to have good control of the land you are growing on and know whether to water or not because it remembers that excess water as well as scarcity can damage your cannabis plants.
At the beginning of the crop, try to irrigate without leaving the substrate flooded to avoid excess water. When you see that the plant grows, you can irrigate with more water until it is an adult plant that can be irrigated to its full capacity. An important fact is that in general, autoflowering cannabis plants do not require as much water in each irrigation as feminized or regular plants which normally require large amounts of water.
6. Best cultivation techniques for automatics
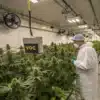
In general, autoflowering cannabis plants, as they have a short life cycle, do not use too many cultivation techniques. However, you can use some tricks with them. The most common is to use training techniques such as LST with autoflowering varieties, especially those that are XL or XXL in size. This allows the arms to lengthen a little more and the central stem of the plant to develop a central bud full of flowers.
That’s not all! Breeders looking for high production can use SOG, a cultivation technique that consists of using smaller pots but increasing the number of plants in the crop. For example; you can take 7L pots and fill an average sized space with 10-15 plants, even if you have a larger space like a greenhouse or a large grow room, you can grow many more plants and thus maximize the harvest.
Promos & Deals
The best Autoflowering calendar For growing outdoor in THe USA and Canada
As you can see, we also reviewed the types of climate and the most relevant aspects for growing autoflowering varieties. Well, now we are going to see what an optimal calendar is like for growing autoflowering plants outdoors because many gardeners do not know exactly what the ideal dates are.
Week 1
The first thing is to prepare the substrate or soil for cultivation. In the previous points, we already talked about that and we made it clear that it is vital to have a good substrate for plant life. We recommend doing this process 1 or 2 weeks before because if you mix your substrate with fungi and solid fertilizers, you can ensure that they decompose in time to start growing.
For its part, germination takes between 24 and 72 hours depending on each seed which explodes, providing a main root from which the seedling begins to be born in its first phase of growth. Remember that in this part of the crop, having between 60–70% humidity and temperatures between 19–25°C are optimal levels with which the weed plant feels comfortable.
Week 2
Here, everything becomes more interesting because the seedlings emerge from the ground with their cotyledons and begin to develop their first pair of leaves. In this period, we must wait for the autoflowering cannabis plant to develop its second pair of leaves to start applying the liquid fertilizers and stimulants that provide it with the necessary nutrition for optimal growth. It is good to clarify that the fertilizers and solid nutrients that adhere to the substrate begin to do their job as well as the microorganisms such as mycorrhizas that stimulate root growth.
Week 3
This is the week where the plant begins to develop in its entirety with leaves that grow quickly and branches that take on considerable size. At this time, techniques such as LST can begin to be applied.
It is good to keep in mind that factors such as humidity should be on average 50% while the temperature should be about 20°C. Your plant will be around 15cm tall at this point. Autoflowering cannabis plants require the greatest number of hours of light to be able to continue growing optimally, so look for the best place where direct light reaches them. The amount of water in each irrigation will increase and each dosage it will be 0.5L.
Week 4
Week 4 arrives and in some cases, pre-flowering begins as the first pistils of the flowers appear. Although, in some autoflowering varieties, it can occur in week 5 or even in week 6. It all depends on the autoflowering cannabis strain that is used. Irrigation can continue to be 0.5L, but now every 24 or 48 hours, depending on the needs of the plant. Remember that there are cannabis plants that require more water consumption than others. Everything is in the genetics.
Regarding the fertilizers, we recommend you keep the growth fertilizers for 1 or 2 more weeks but decreasing the quantity. For example, if you use 1ml/L of water normally, now you can use 0.5ml/L of water. This means that the plant looks for nutrients in the substrate and also consumes all the food it finds. It also helps it to have one last growth spurt at the end of growth.
Week 5
During week 5, the flowers are already taking shape little by little. If you do not want to continue applying growth fertilizers as we told you in the previous week, you can switch to fertilizers and flowering stimulants. With regard to humidity, it should be between 45% and 50% approximately and the temperature should be around 23ºC.
Week 6
The flowers are already formed both in the lateral colas and in the central bud, so it is a matter of weeks to see the full potential of the plants. In relation to humidity measures, this should be maintained at 40% and temperatures at 24ºC but because you are growing these plants autoflower outdoors, the best thing you can do is maintain a daily inspection of the plants to avoid problems with pests and harmful fungi.
With regard to nutrients, you can start by applying small doses of resin stimulator in order to ensure greater production of trichomes and also larger caliber crystals. You can also apply a fattening agent in a minimum dose so that the buds swell and become fat and heavy.
Week 7
With regard to nutrients, you can start by applying small doses of resin stimulator in order to ensure greater production of trichomes and also larger caliber crystals. You can also apply a fattening agent in a minimum dose so that the buds swell and become fat and heavy. The feeding of the base fertilizers for flowering is maintained and is essential as a support for the new stimulants that are used.
Week 8
The plant begins to enter the final stretch in week 8 and you can continue applying the fertilizers and stimulants and also do the daily review of the autoflowering cannabis plants. Although, some gardeners decide to start the process of rinsing the cannabis plants or root washing this week. However, as we already said, it is normal for the plants to be delayed 1 or 2 weeks. For this reason, continuing feeding for another week is not harmful to your crop.
Week 9
If you have left the plants one more week with their food, then it is here in week 9 when you can carry out the root wash. After this, you will see how the plant begins to show a large number of yellow leaves because the plant begins to consume the nutrients that remain in the substrate or soil and also because it is beginning to end its life cycle little by little.
Week 10
This week, you have 2 possibilities: let the plant rest after washing the roots of the previous week to lower its stress levels a little or you can proceed to harvest your autoflowering plant, collecting the tasty buds it delivers.
If you choose to let it rest, you can apply a technique that consists of putting the plant in complete darkness for 2 or 3 days so that the trichomes explode and cover all the buds. Many gardeners are followers of this technique which is applied after flushing the roots and before harvesting the cannabis plant.
The best autoflowering cannabis seeds for growing outdoors
Buy Magnum Autoflower strain online
Since its appearance, Magnum Auto has been one of the best-selling strains on the market because it surprised with its power, ease of cultivation, and even its speed. It is recommended to grow it in Mediterranean and dry climates because it withstands these conditions very well in outdoor crops, managing to harvest 80gr-120gr per plant. If you grow it indoors, about 3250gr-400gr/m2 in just 8-9 weeks of cultivation from germination.
Buy Red Gorilla Autoflower strain online
If you are looking for production, Red Gorilla Auto will give you everything you want because it produces 120gr-200gr outdoors per plant and about 450gr-500gr/m2 indoors. In addition, her buds have potent THC levels, ranging from 15%-22% with sweet flavors and citrus and wood notes.
We recommend this variety because it only takes 8-9 weeks from sowing to flowering, producing fat buds that are usually compact. You should inspect the plants at each stage of the process to avoid problems with fungi that damage the harvest, especially in places where the humidity is too high.
Buy Neville Haze Autoflower strain online
Neville Haze Auto is the strain indicated for cultivation in humid places and with high temperatures because it is mostly sativa and produces buds that are a little more airy than an indica. In addition, the entire cultivation cycle takes between 10-11 weeks, so you can make the most of the sun’s rays to produce between 120gr-200gr outdoors and about 450gr-550gr indoors.
For its part, the Neville Haze Auto buds produce very energizing, euphoric effects and give off flavors with a taste of haze and earthy notes. THC levels range from 18%-22% and you can harvest great buds if you apply cultivation techniques like LST or similar.
FAQs about Grow Autoflowering
Can autoflowering cannabis be grown outdoors successfully?
Yes, autoflowering cannabis can thrive outdoors with proper care. Many growers mistakenly believe these strains are only suitable for indoor setups, but with the right conditions—like plenty of sunlight, the right pot size, and nutrient-rich soil—autoflowering strains can produce high-quality outdoor yields. Following a seasonal planting schedule ensures even better results.
What is the best time of year to grow autoflowering weed outdoors?
The best time to grow autoflowering outdoor seeds is from mid-spring to late summer. In regions like the Mediterranean or parts of California, starting your grow in April or May allows the plants to benefit from longer daylight hours and optimal temperatures, often making it possible to achieve two harvests in a single season.
Do autoflowering cannabis plants require special growing techniques?
While autoflowers grow quickly and don’t typically need complex training, techniques like LST (Low Stress Training) can improve yield, especially for XL or XXL strains. For high production, methods like SOG (Sea of Green) are also effective. These techniques help maximize space and bud development even in outdoor environments.