Plant Growth Stages Cannabis

Growing cannabis is a journey through several plant growth stages. Each phase requires different care and attention. Whether you’re new to this or have some experience, knowing these stages will help you cultivate healthy plants.
Cannabis growth begins with the seed germination phase. This is the starting point of the indoor cannabis growth cycle stages. During this time, seeds crack open and roots start to form. Ensure seeds are in a moist environment to encourage sprouting.
Recommended Strains
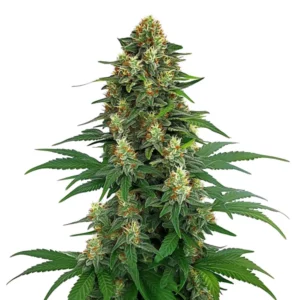
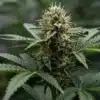
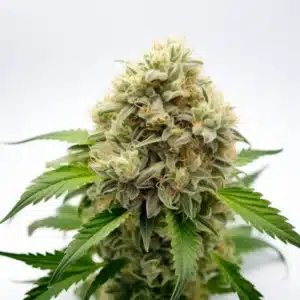
Tangie
|
|
THC | 19% - 22% (Medium) |
|
|
Type | Feminized |
|
|
Yield | High |
|
|
Phenotype | 30% Indica / 70% Sativa |
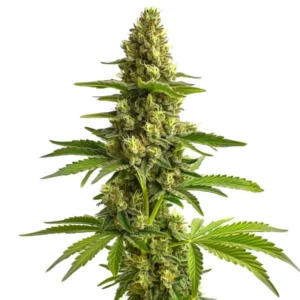
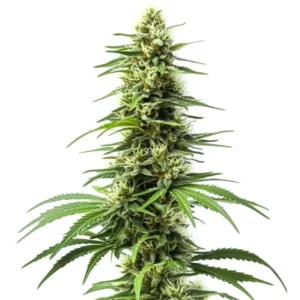
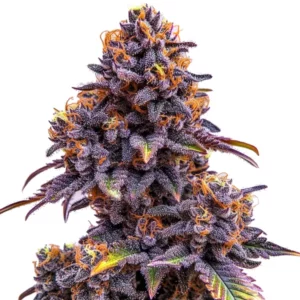
Bruce Banner #3
|
|
THC | 20% - 29% (High) |
|
|
Type | Feminized |
|
|
Yield | Medium |
|
|
Phenotype | 50% Indica / 50% Sativa |
After germination, you’ll move to the cannabis seedling stage. This is a critical phase for your plant. Seedlings are sensitive and require proper light and humidity. Providing cannabis seedling stage care tips can make a significant difference at this point.
Cannabis Vegetative Growth Timeline
Once past the seedling stage, the plant enters the vegetative phase. This is when growth accelerates. Leaves multiply and roots dig deeper into the soil. During this stage, cannabis plants require more light, typically around 18 hours a day.
Monitoring nutrients is key during this period. Nitrogen is especially important for leaf development. Real-life example: a grower using a strain like Tangie from Blimburn Seeds might notice vigorous growth during this phase.
The cannabis vegetative growth timeline is not only characterized by the rapid increase in size but also by the plant’s need to establish a strong foundation. This is the time when growers often train their plants to maximize future yields. Techniques like topping or low-stress training can be implemented to encourage a bushier structure.
During the vegetative stage, it’s also crucial to maintain a balanced pH level in the soil or nutrient solution. This ensures that your plants can absorb nutrients effectively, preventing issues like nutrient lockout. Keeping a close eye on the plant’s health and making necessary adjustments is vital for a successful vegetative phase.
- Increase lighting to support growth.
- Provide ample nutrients, especially nitrogen.
- Ensure proper air circulation to prevent mold.
Transitioning from Vegetative to Flowering
As the cannabis plant development stages guide suggests, transitioning from vegetative to flowering involves changing the light cycle. Reducing light to 12 hours signals the plant to start flowering.
Adjusting nutrients is also necessary. Focus more on phosphorous and potassium during this stage. These nutrients help with bud development. A strain like Bruce Banner 3 from Blimburn Seeds can benefit greatly from these adjustments.
This transition is a critical step in the plant growth stages cannabis cultivators aim to master. An abrupt change in the environment can stress the plants, so it’s advisable to gradually adjust the light schedule over a few days. This method helps the plants acclimate smoothly, reducing the risk of shock.
As the plant begins to show signs of flowering, such as the formation of pre-flowers, it’s important to keep a close watch for any male plants if you’re growing from regular seeds. Removing males early can prevent unwanted pollination, ensuring that the energy is directed towards bud production.
Watch for signs of stress as you change light cycles. Plants may show wilting or leaf discoloration. Address any issues promptly to ensure a smooth transition.
Promos & Deals

Knowing Cannabis Flowering Stages
The flowering stage is when the plant begins to produce buds. This stage varies in length depending on the strain. For instance, Girl Scout Cookies from Blimburn Seeds typically has a flowering time of 8-9 weeks.
During this time, it’s crucial to control humidity and temperature. High humidity can lead to mold on buds. Aim for a range of 40-50% humidity during flowering.
Knowing cannabis flowering stages is essential to optimize bud development. As the plant progresses through flowering, the buds will start to swell and become more resinous. This is also when the plant’s aroma becomes more pronounced, a sign that the terpenes are developing.
To support bud growth, ensure that the plants receive the right spectrum of light, typically leaning towards the red spectrum. It’s also beneficial to use a nutrient solution designed for flowering, rich in phosphorus and potassium. This will promote denser and more potent buds.
- Maintain a consistent 12/12 light cycle.
- Adjust nutrient mix to support flowering.
- Monitor humidity closely to prevent mold.
Harvesting and Curing
After flowering, it’s time to harvest. Knowing when to harvest is vital. Look for changes in trichomes, tiny crystals on the buds. When they turn milky white, it’s a good indicator.
Once harvested, curing is the next step. This process enhances flavor and potency. Hang dried buds in a cool, dark place for a few weeks. This step is crucial for quality.
Harvesting is a reward for understanding cannabis flowering stages and ensuring all previous growth phases were managed well. Timing the harvest correctly affects the plant’s potency and flavor profile. Harvesting too early can result in less potent buds, while harvesting too late can lead to a more sedative effect.
Curing is an art that requires patience. During this phase, it’s crucial to burp the jars regularly to release excess moisture and prevent mold. This step also allows for the slow breakdown of chlorophyll, which can significantly enhance the smoothness and taste of the final product.
Be patient during curing. Rushing can lead to less flavorful results. Proper curing can turn a good strain into a great one.
Cannabis Plant Development Stages Guide
To recap, cannabis grows through several stages, from germination to harvest. Each stage requires specific care. Following a cannabis plant development stages guide can help ensure you meet all the plant’s needs.
Each strain may have unique requirements, so it’s important to adjust care according to the strain you’re growing. For example, Bruce Banner or Tangie may have different nutrient needs.
Knowing the full spectrum of plant growth stages cannabis goes through is crucial for any grower. By following a detailed cannabis plant development stages guide, growers can anticipate the needs of their plants and make proactive adjustments to their care routines.
Moreover, documenting each stage of growth can provide valuable insights for future grows. Keeping a journal of what works and what doesn’t can help refine techniques and improve yields over time. This proactive approach is beneficial for both novice and experienced cultivators.
- Adapt care routines based on plant stage.
- Monitor plant reactions and adjust accordingly.
- Keep records of growth patterns for future reference.
FAQs About Plant Growth Stages Cannabis
What is the ideal lighting schedule for cannabis during vegetative growth?
During the vegetative growth phase, cannabis thrives with an 18/6 light schedule, meaning 18 hours of light followed by 6 hours of darkness. This mimics the long days of summer, encouraging robust growth. Using high-quality LED lights can also enhance plant health during this stage.
In some cases, growers might experiment with a 24-hour light schedule to maximize growth. However, this can stress some strains. It’s important to observe your plants and adjust if they show signs of stress such as curling leaves or stunted growth.
The cannabis vegetative growth timeline can vary based on strain and environmental factors. Some growers prefer to extend this period to allow the plant to reach a desired size before transitioning to flowering. This decision should consider available space and the plant’s natural growth tendencies.
It’s also important to gradually acclimate plants to outdoor conditions if they’re being moved from an indoor setup. This process, known as hardening off, helps the plants adjust to natural sunlight and temperature fluctuations, setting them up for success in the flowering stage.
How can I prevent mold during the flowering stage?
Preventing mold during the flowering stage involves controlling humidity levels and ensuring proper airflow. Keep the humidity between 40-50% and use fans to circulate air around the plants. This helps in reducing moisture buildup, which is a common cause of mold.
Regularly inspect your buds for signs of mold. If detected early, you can often salvage most of your crop by removing affected areas. Strains like Girl Scout Cookies are particularly sensitive, so extra care is needed during humid periods.
Knowing cannabis flowering stages is key to preventing mold. As buds thicken, their density can trap moisture, creating an ideal environment for mold growth. Regular pruning of excess foliage can improve airflow and reduce this risk.
Additionally, consider using a dehumidifier in your grow space to maintain optimal humidity levels. This is particularly useful in regions with naturally high humidity. Ensuring the grow area is clean and sanitary also helps in minimizing mold spores in the environment.
What nutrients are essential during the cannabis seedling stage?
During the cannabis seedling stage, nutrients should be administered carefully. Young seedlings primarily require nitrogen, phosphorus, and potassium (NPK) in lower concentrations. A balanced seedling nutrient solution can ensure healthy early growth.
Avoid over-fertilizing at this stage. Seedlings are delicate, and too much nutrient can cause nutrient burn, characterized by browning tips on the leaves. Observing the plant’s response is crucial to adjust feeding appropriately.
Cannabis seedling stage care tips also include ensuring the soil or growing medium is not too compact. This stage is critical for root development, and compacted soil can inhibit proper root growth. Using a light, airy medium can facilitate better root expansion.
Additionally, maintaining a consistent temperature and humidity level is crucial for seedlings. They thrive in a stable environment, so fluctuations should be minimized. Utilizing a humidity dome can help maintain the ideal conditions for young seedlings.
How do I know when my cannabis plants are ready to harvest?
Determining the right time to harvest involves observing the trichomes on the buds. These tiny resin glands change color as the plant matures. When they shift from clear to a milky white, it’s a sign that the plant is ready to be harvested for maximum potency.
Additionally, the pistils, or hair-like structures on the buds, will turn from white to a reddish-brown color. Monitoring both trichomes and pistils can provide a more accurate picture of the plant’s readiness for harvest.
Beyond visual cues, the plant’s overall health and growth patterns should be considered. A cannabis plant development stages guide can provide benchmarks for typical harvest times, but individual plants may vary. Keeping detailed records can aid in fine-tuning harvest timing.
Some growers conduct a partial harvest, taking the top buds first and allowing the lower ones more time to mature. This technique can maximize yield and potency, especially if the lower buds haven’t fully developed by the initial harvest time.
What are some common mistakes during the indoor cannabis growth cycle stages?
Common mistakes include overwatering, inadequate lighting, and poor air circulation. Overwatering can lead to root rot, while insufficient lighting can stunt growth. Proper air circulation is necessary to prevent mold, especially during the flowering stage.
Another frequent error is neglecting pH levels in the water and soil, which can lead to nutrient lockout. Regularly testing and adjusting pH can prevent these issues. Keeping a detailed grow journal can help in identifying and correcting mistakes quickly.
Failing to understand the cannabis vegetative growth timeline can lead to overcrowding in indoor setups. Plants grow rapidly during this stage, so it’s important to anticipate their mature size and space them accordingly. Overcrowding can limit light penetration and airflow.
Ignoring the importance of pest control is another common oversight. Regularly inspecting plants for signs of pests and using preventive measures can save a crop from significant damage. Integrated pest management practices can be beneficial for maintaining a healthy grow environment.