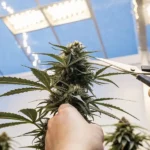
When to Top Autoflower: Timing & Techniques

Optimal Timing for Topping Autoflowers: The best period to top an autoflowering cannabis plant is between days 14 and 21, once it has developed three to five nodes. This timing is crucial as autoflowers have a rapid lifecycle. Topping too late or under stress can stunt growth and reduce yield significantly, impacting your harvest potential.
Autoflowering cannabis strains offer a unique cultivation experience with their rapid growth and flowering independent of light cycles. Understanding the terpene profile, such as Myrcene at 0.8-1.2%, can enhance your growing strategy. These strains typically flower in 70-80 days from seed, making timing crucial for techniques like topping to maximize yield and potency.
Recommended Strains

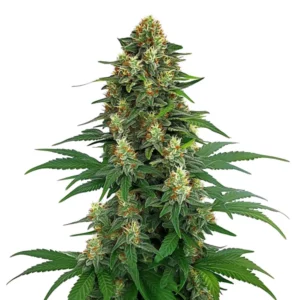
Acapulco Gold
|
|
THC | 15% - 19% (Medium) |
|
|
Type | Feminized |
|
|
Yield | High |
|
|
Phenotype | 30% Indica / 70% Sativa |

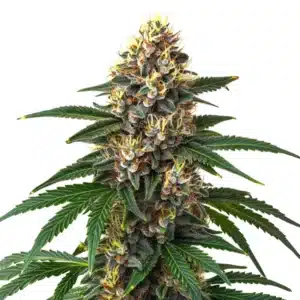
Acapulco Gold Autoflower
|
|
THC | 20% - 24% (High) |
|
|
Type | Autoflowering |
|
|
Yield | Medium |
|
|
Phenotype | 30% Indica / 70% Sativa |
Understanding Autoflowers
What Makes Autoflowers Unique?
Autoflowering strains originate from Cannabis ruderalis, known for flowering based on age rather than light exposure. This trait allows them to complete their lifecycle in about 70-80 days, ideal for growers seeking quick harvests. Their genetic makeup includes a shorter vegetative phase, necessitating precise timing for any high-stress training techniques like topping.
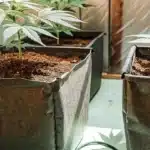
These plants typically reach a height of 1.5-3 feet (45-90 cm), making them suitable for indoor cultivation. Their compact size and rapid growth require careful management of nutrients and light. With a recommended light schedule of 20/4, autoflowers thrive under consistent conditions, ensuring robust growth and development.
Signs Your Plant is Ready
Identifying the right time to top your autoflower is crucial. Look for three to four healthy nodes, which usually appear around day 14 to 21. The plant should exhibit vigorous growth, with no signs of nutrient deficiencies or pest infestations. Healthy, vibrant green leaves indicate the plant is ready to handle the stress of topping.
Monitoring your plant’s growth rate is essential. Use a digital hygrometer to maintain humidity between 55-60% RH, ensuring optimal conditions. Avoid topping if the plant shows signs of stress, such as wilting or yellowing leaves, as this can lead to stunted growth and reduced yields.
Promos & Deals


When to Top Autoflowers
Optimal Timing for Topping
The ideal window for topping autoflowers is when they have developed three to five nodes, typically between days 14 and 21. This timing allows the plant to recover and redirect energy towards producing multiple colas. Topping too late can stunt growth, as autoflowers have a limited vegetative period before entering the flowering stage.
Ensure your plant is in peak health before topping. Maintain a temperature range of 68°F – 77°F (20°C – 25°C) and provide adequate nutrients with an N:P:K ratio of 3:1:2 during vegetative growth. This supports robust development and prepares the plant for the stress of topping.
Signs Your Plant is Ready
Before topping, assess the plant’s health. Look for strong, healthy branches with no signs of stress. The nodes should be evenly spaced, and the plant should have a sturdy main stem. These indicators suggest the plant is ready to handle the stress of topping and will recover efficiently.
Using sterilized tools is crucial to prevent infections. Make a clean cut just above the third or fourth node to encourage lateral growth. This technique removes apical dominance, allowing the plant to focus energy on developing multiple colas, enhancing light distribution and yield.
How to Top Autoflowers
Step-by-Step Topping Guide
Topping involves cutting the main stem to promote the growth of multiple colas. Start by identifying the main stem and the node you plan to cut. Use sterilized scissors or a sharp blade to make a clean cut just above the third or fourth node. This encourages the plant to develop a bushier structure with more bud sites.
After topping, monitor the plant’s recovery. Provide optimal conditions, including adequate light, water, and nutrients. A balanced N:P:K ratio of 3:1:2 supports recovery and promotes new growth. Expect to see new branches sprouting from the nodes below the cut within a week.
Tools You Need
Using the right tools is essential for successful topping. Sterilized scissors or a sharp blade are necessary to make clean cuts and prevent infections. A digital hygrometer helps maintain humidity levels between 55-60% RH, crucial for recovery. Ensure your tools are clean and sharp to avoid damaging the plant.
After topping, keep a close eye on your plant. Adjust your care routine as needed, providing extra support if necessary. Use plant ties or stakes to support new growth, ensuring the plant remains upright and healthy as it develops multiple colas.
| Feature / Merkmal | GG4 Auto | Super Lemon Haze Auto | Blueberry X Jack Herer Auto |
|---|---|---|---|
| THC Content | 24-28% | 20-25% | 18-22% |
| Dominant Terpene | Caryophyllene | Limonene | Myrcene |
| Yield | 1.5-1.8 oz/ft² (450-550 g/m²) | 1.2-1.5 oz/ft² (350-450 g/m²) | 1.0-1.3 oz/ft² (300-400 g/m²) |
| Flowering Time | 70-75 days | 75-80 days | 70-75 days |
| Height | 2-3 feet (60-90 cm) | 2-4 feet (60-120 cm) | 2-3 feet (60-90 cm) |
Benefits and Risks of Topping
Pros of Topping Autoflowers
Topping autoflowers can significantly increase yield by promoting multiple colas, enhancing light distribution. This method encourages a bushier plant structure, allowing light to penetrate more evenly and improving airflow. A well-topped plant can yield 1.5-1.8 oz/ft² (450-550 g/m²), depending on the strain and growing conditions.
Improved light distribution leads to more efficient photosynthesis, boosting growth and bud development. Enhanced airflow reduces the risk of mold and pests, contributing to healthier plants. However, topping requires precise timing and technique to avoid stunting growth, especially in autoflowers with limited recovery time.
Cons and Common Mistakes
The primary risk of topping autoflowers is stunted growth if done too late. Topping after the plant has entered the flowering stage can significantly reduce yield and overall plant health. Additionally, improper cutting techniques or using dirty tools can introduce pathogens, leading to infections and slower recovery.
To avoid these pitfalls, ensure your plant is healthy and well-nourished before topping. Use sterilized tools and make clean cuts just above the node. Monitor your plant’s recovery closely, providing optimal conditions to support new growth and prevent stress-related issues.
Alternatives to Topping
Low-Stress Training (LST)
Low-Stress Training involves gently bending and tying down branches to promote horizontal growth. This method reduces stress on the plant and can be very effective for autoflowers. Begin LST when the plant is young and flexible, minimizing the risk of breaking branches and promoting even canopy development.
Use soft ties to bend branches away from the center of the plant, securing them in place to maintain the shape. Adjust the ties regularly as the plant grows, ensuring even growth and light distribution. LST can enhance yield without the high stress associated with topping.
Super Cropping
Super cropping involves pinching and bending branches to create minor stress points. This technique strengthens branches and promotes more bud sites, potentially increasing yield. Choose flexible branches and gently pinch until the inner core gives way, then bend at a 90-degree angle.
Provide support if necessary to help the plant recover and continue growing. Super cropping can be combined with other training methods, such as LST, to maximize yield and improve plant structure. Monitor the plant’s recovery and adjust care as needed to support new growth.
Professional Tips for Topping Autoflowers
- Maintain 58-62% RH during recovery. Below 55% can slow growth; above 65% risks mold. Use a digital hygrometer.
- Top at the third or fourth node for best results. Topping later can stunt growth and reduce yield.
- Use sterilized tools to avoid infections. Clean cuts promote faster recovery and healthier plants.
- Monitor plant health closely post-topping. Ensure adequate light, water, and nutrients to support recovery.
- Consider combining topping with LST for enhanced yield. This creates a robust plant structure with multiple colas.
- Keep a grow journal to track topping results. Document timing, method, and outcomes to refine your technique.

FAQs about Topping Autoflowers
What stunts autoflower growth?
Autoflower growth can be stunted by topping too late, nutrient deficiencies, or environmental stress. Ensure your plant receives proper care, with temperatures between 68°F – 77°F (20°C – 25°C) and adequate light. Avoid topping after the plant has entered the flowering stage to prevent reduced yields.
Should you remove fan leaves on autoflower?
Removing fan leaves can improve light penetration and airflow, but it should be done sparingly. Excessive defoliation can stress the plant, especially in autoflowers with a short lifecycle. Aim to maintain a balance, removing only leaves that block light to bud sites.
Is it worth topping an autoflower?
Topping an autoflower can increase yield by promoting multiple colas, but it requires precise timing and technique. Done correctly, it can enhance light distribution and airflow, improving overall plant health. Expect yields of 1.5-1.8 oz/ft² (450-550 g/m²) with proper care.
How many times can I top an autoflower?
Autoflowers should typically be topped only once due to their short lifecycle. Multiple toppings can stress the plant and reduce yield. Focus on early topping, around the third or fourth node, to maximize recovery time and promote healthy growth.
What are the alternatives to topping autoflowers?
Alternatives to topping include Low-Stress Training (LST), super cropping, and the Screen of Green (ScrOG) method. These techniques enhance yield and promote even growth without the high stress associated with topping. Each method has its benefits, depending on your growing conditions and goals.