Expert Guide: How to Do Sap Testing for Cannabis Plants Easily

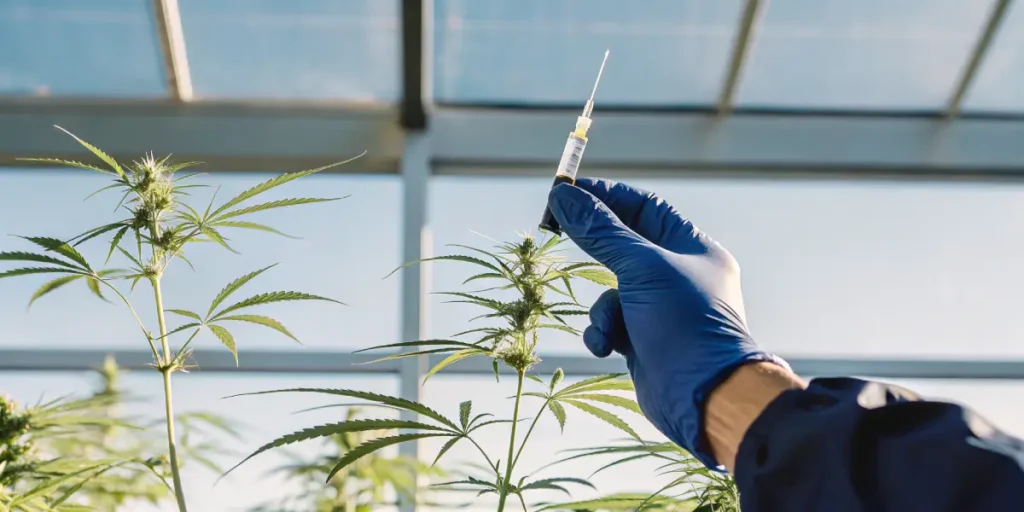
Sap testing for cannabis plants is a crucial technique for growers seeking optimal plant health and yield. This process involves analyzing the nutrient content within the plant’s sap to determine what the plant is absorbing from the soil. By knowing how to do sap testing for cannabis plants, growers can make informed decisions about nutrient management and improve their cultivation practices.
The procedure is straightforward and can be done with minimal equipment. Growers extract a small amount of sap from the stems or leaves of the cannabis plant and then analyze it for nutrient levels. This analysis helps identify any deficiencies or excesses in nutrients, allowing for precise adjustments in fertilization and care.
Recommended Strains

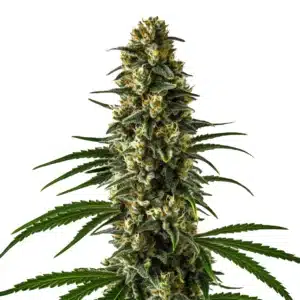
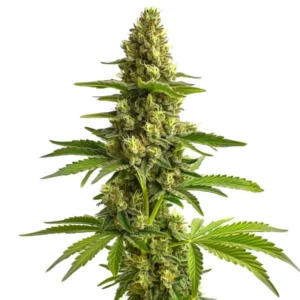
GG4
|
|
THC | 27% (High) |
|
|
Type | Feminized |
|
|
Yield | High |
|
|
Phenotype | 40% Indica / 60% Sativa |
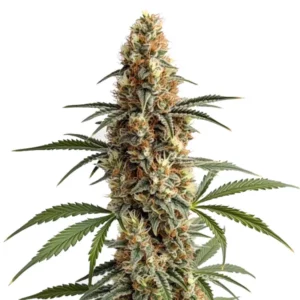
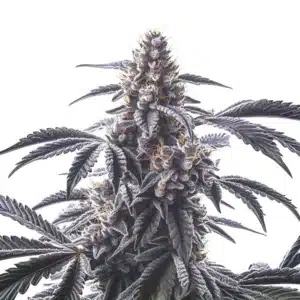
Bruce Banner #3
|
|
THC | 20% - 29% (High) |
|
|
Type | Feminized |
|
|
Yield | Medium |
|
|
Phenotype | 50% Indica / 50% Sativa |
To get started with sap testing, it’s essential to have a clear plan and understand the steps involved. This includes selecting the right cannabis strains, like those offered by Blimburn Seeds, which are known for their robust growth and high-quality yields.
Why Sap Testing is Important for Cannabis Cultivation
Sap testing for cannabis plants is a game-changer for growers aiming to optimize their cultivation practices. By analyzing the plant’s sap, growers can gain insights into the nutrient uptake and overall health of the cannabis plants. This knowledge is invaluable in preventing nutrient imbalances that could affect growth and yield.
For example, if a grower notices yellowing leaves on their GG4 strain from Blimburn Seeds, sap testing can reveal whether this is due to a nitrogen deficiency or another issue. This targeted approach ensures that plants receive exactly what they need, reducing waste and improving efficiency.
Moreover, sap testing for cannabis plants procedure offers an ongoing method to track the health and nutrient status of plants over time. This dynamic monitoring means that adjustments can be made in real-time, preventing long-term damage or stunted growth. Knowing how to analyze sap from cannabis plants gives growers a precise tool to balance nutrient levels based on actual plant needs.
Additionally, building a routine around sap testing helps cultivate a deeper knowing of each strain’s unique needs. By leveraging data from sap analysis, growers can tailor their nutrient management strategies to enhance the unique characteristics of each strain, whether it’s increasing the resin production in a high THC strain or boosting the terpene profile in a CBD-rich varietal.
Promos & Deals


Essential Equipment for Sap Testing
To begin the sap testing for cannabis plants procedure, you will need a few essential tools. A sap press or garlic press can be used to extract the sap from the plant tissue. You’ll also need a reliable nutrient analysis kit or send samples to a laboratory for comprehensive results.
It’s important to have a clean workspace and sterile tools to avoid contamination. Sample collection bags or bottles are necessary to store the sap samples before analysis. Having these tools on hand ensures that your cannabis sap testing best practices are followed, providing accurate and reliable results.
Investing in high-quality tools for sap testing not only improves accuracy but also longevity in usage. A durable sap press can withstand repeated use throughout many growth cycles, making it a smart investment for dedicated cultivators. Additionally, high-quality nutrient analysis kits often come with detailed instructions and support, making it easier to interpret results and implement necessary changes.
Good preparation with the right equipment sets the foundation for successful sap testing. Besides to physical tools, having a well-organized cannabis plant sap analysis guide can streamline the process, ensuring each step is executed correctly. This guide aids in maintaining consistency and accuracy, critical for obtaining meaningful results from sap testing.
Steps for Cannabis Sap Testing
Begin by selecting healthy leaves from your cannabis plant, such as the potent Bruce Banner #3 strain from Blimburn Seeds. Choose leaves from both the top and bottom of the plant to get a comprehensive picture of nutrient distribution. Rinse the leaves with distilled water to remove any surface contaminants.
Use the sap press to extract the sap from the leaves. Collect the sap in a clean container, being careful not to mix samples from different plants or strains. Label each sample clearly, noting the plant and strain, to keep your cannabis plant sap analysis guide organized.
After collection, store the sap samples in a cool, dark place if immediate analysis isn’t possible. Prompt processing is crucial as delays can alter the nutrient composition due to degradation. This ensures that your results reflect the plant’s true nutrient status at the time of collection.
When following the steps for cannabis sap testing, consistency is key. Repeatedly using the same procedure for sap extraction and analysis helps in building a reliable data set over time. This longitudinal data becomes invaluable for tracking trends in nutrient absorption and making informed adjustments to cultivation practices.
Interpreting Sap Analysis Results
Interpreting the results of your sap analysis is crucial for making informed decisions. If the analysis shows low nitrogen levels in your Green Crack strain from Blimburn Seeds, consider adjusting your fertilization schedule to include more nitrogen-rich nutrients.
It’s important to note that nutrient requirements can vary between strains and growth stages. Therefore, regular sap testing is recommended to keep up with the changing needs of your plants. This proactive approach helps prevent nutrient lockout and other issues.
Knowing the implications of nutrient imbalances is vital. For instance, an excess of potassium can impede the uptake of other essential nutrients like magnesium and calcium, leading to secondary deficiencies. By interpreting sap analysis results accurately, growers can fine-tune their nutrient inputs to avoid such cascading problems.
Moreover, integrating the findings from sap analysis into a broader cultivation strategy enhances overall plant care. This includes adjustments in watering schedules, light exposure, and environmental conditions. How to do sap testing for cannabis plants effectively encompasses not just the testing itself, but also the holistic management of plant health based on those results.
FAQs about How to do sap testing for cannabis plants
What is the best time to perform sap testing on cannabis plants?
The best time to perform sap testing on cannabis plants is during the vegetative and flowering stages. These stages are critical for nutrient uptake, and sap testing can help identify the plants’ needs during these periods. It’s advisable to test every few weeks to keep track of nutrient levels and make timely adjustments.
Performing sap testing in the early morning is ideal, as the plants have had time to process nutrients overnight. This timing ensures that the sap sample accurately reflects the plant’s current nutrient status, leading to more reliable results.
Testing during these stages provides insights into the nutrient dynamics as the plant transitions from vegetative growth to flowering. This transition is when nutrient demands shift significantly, and sap testing can highlight these changes, allowing for timely adjustments to nutrient regimens.
Additionally, conducting sap testing in the morning can help avoid the midday fluctuations in nutrient levels caused by transpiration and photosynthesis. This consistency in timing helps maintain the reliability of your sap testing results, aligning them closely with the plant’s physiological state.
How often should sap testing be conducted for optimal results?
For optimal results, sap testing should be conducted every two to three weeks. This frequency allows growers to monitor changes in nutrient uptake and respond accordingly. Regular testing helps maintain the nutrient balance needed for healthy growth and maximizes the potential yield of your cannabis plants.
Frequent sap testing also helps catch any nutrient imbalances early, reducing the risk of deficiencies or toxicities that could harm your plants. By staying vigilant, you can ensure your cannabis strains, such as those from Blimburn Seeds, thrive throughout their growth cycle.
Regular intervals of sap testing provide a timeline of nutrient availability and uptake, which is essential for knowing long-term trends and making strategic adjustments. This proactive approach ensures that nutrient levels are consistently aligned with the plants’ needs, leading to robust growth and enhanced yield.
Furthermore, by routinely following the steps for cannabis sap testing, growers can build a comprehensive nutrient profile for each strain. This data becomes a valuable resource for predicting future needs, optimizing fertilization, and preventing nutrient-related issues before they arise.
Can sap testing be done on all cannabis strains?
Yes, sap testing can be done on all cannabis strains. Whether you’re growing the popular Girl Scout Cookies or experimenting with new strains from Blimburn Seeds, sap testing provides valuable insights into the specific nutrient needs of each plant. It’s a versatile technique that can be applied to any strain.
Different strains may have unique nutrient requirements, so it’s beneficial to perform sap testing on each strain you cultivate. This approach ensures that you provide the right nutrients for each plant’s specific needs, promoting healthy growth and robust yields.
This adaptability makes sap testing an invaluable tool in diversified growing environments. As each strain can respond differently to nutrient inputs, sap testing allows for tailored management, ensuring that each plant reaches its full potential.
Moreover, applying cannabis sap testing best practices across different strains can reveal broader insights into nutrient interactions and plant health, contributing to a deeper knowing of cannabis cultivation as a whole. This comprehensive view aids in refining cultivation techniques to enhance both quality and yield.
What are some common mistakes to avoid in sap testing?
One common mistake is not using clean tools and containers, which can lead to contamination and inaccurate results. Always ensure that your equipment is sterilized before use. Another mistake is not labeling samples correctly, which can cause confusion and misinterpretation of results.
Additionally, avoid over-reliance on sap testing alone. It’s important to consider other factors like soil health and environmental conditions. Combining sap testing with other monitoring techniques provides a more holistic view of your cannabis plants’ health.
Neglecting the timing of sample collection can also introduce errors. Consistently collecting samples at the same time of day ensures that results are comparable and not skewed by daily fluctuations in plant metabolism.
Furthermore, misinterpreting results without considering the specific growth stage or environmental conditions can lead to incorrect adjustments. Always contextualize sap analysis findings within the broader framework of your cultivation strategy to make informed decisions.
How does sap testing compare to soil testing?
Sap testing offers a direct glimpse into what the plant is absorbing, while soil testing provides information about nutrient availability in the growing medium. Both methods are valuable, but sap testing is more specific to the plant’s current nutrient status.
While soil testing can guide initial nutrient applications, sap testing helps fine-tune nutrient management throughout the plant’s life. Together, these tests offer a comprehensive approach to ensuring your cannabis plants get exactly what they need for optimal growth.
The integration of both testing methods enhances the precision of nutrient management. Soil testing can highlight potential deficiencies in the growth medium, while sap testing confirms whether these nutrients are being absorbed effectively by the plant.
This dual approach ensures that nutrient inputs are both present in the soil and accessible to the plant, optimizing the conditions for growth. By using a combination of soil and sap testing, growers can achieve a balanced and responsive nutrient management strategy.