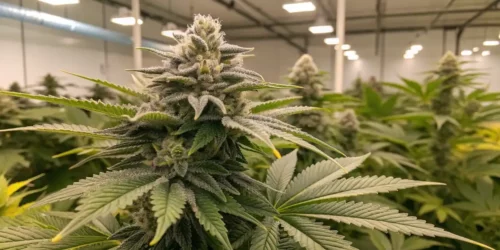
Growing indoor cannabis is super easy and popular for both recreational cannabis enthusiasts and individuals seeking its medicinal benefits. Growing indoor cannabis is one of the most popular activities between the members of the weed community.
Once you grasp the fundamentals of nurturing cannabis plants in your own space, with continued practice, the rest becomes second nature. It’s not a complicated skill to acquire and offers an amazing experience.
Speak to any experienced cannabis grower, and you’ll be sure to hear first-hand accounts of the magic of growing cannabis at home. From the daily tranquility of tending to your indoor cannabis garden to the satisfaction of experimenting with various training techniques, there’s much to appreciate.
Discover our extensive catalog with more than 1000 varieties, of feminized, autoflowering, and high thc seeds with stable genetics and easy to grow indoors or outdoors.
Why Indoor Cannabis Cultivation is on the Rise
In this article, we will explain why growing cannabis indoors cannabis has become one of the most popular methods today.
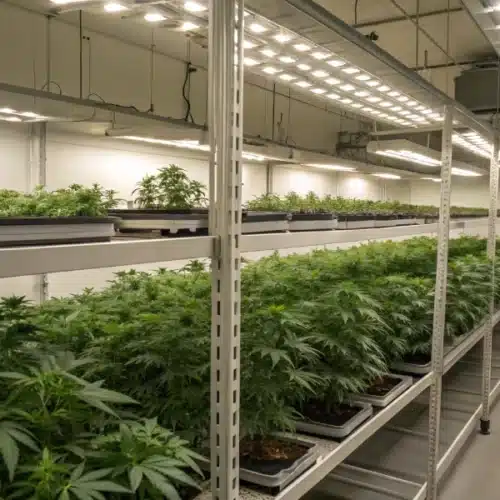
Personalized control: Establishing an indoor cultivation space empowers you to finely manage specific elements that are ideal for your selected cannabis strain. Taking charge of factors such as temperature, lighting, humidity levels, ventilation, and nutrient provision results in healthier, more prolific yields.
Elevated quality: Indoor cannabis varieties often boast superior quality, heightened vibrancy, and increased potency, offering enhanced flavors and a greater abundance of trichomes.
Weather resilience: If you happen to reside in an area unsuitable for outdoor cannabis cultivation, indoor growing shields your crops from adverse weather conditions such as storms, strong winds, heavy rain, and extreme temperature fluctuations.
Reduced risk of pests and diseases: Certain top-notch indoor strains exhibit enhanced resistance to pests and diseases. Maintaining a clean, sterile environment indoors can further minimize the likelihood of encountering these issues.
Consistent year-round harvests: Cultivating cannabis indoors enables year-round harvesting, as you are not dependent on seasonal changes.
Increased THC Levels: One of the most significant benefits of an indoor operation is the ease of introducing more carbon dioxide into the environment. CO2 levels in grow rooms can be manipulated to ensure optimal growth and yield, often resulting in higher THC levels.
Enhanced Security: An indoor location that can be securely locked is often easier to manage and monitor in terms of security compared to an open field. Some state security requirements mandate personnel and equipment to digitally and visually oversee plant inventories and technology, which can be a much more challenging task when dealing with a widely spread crop in an outdoor setting.
Setting Up Your Indoor Cannabis Garden
Establishing an indoor marijuana cultivation system in your residence is simpler than you might imagine. While it does involve a bit of an investment of both time and money, assembling the necessary materials and constructing it doesn’t demand significant expertise and can be accomplished inexpensively.
This guide will demonstrate the process of creating three distinct indoor cannabis garden setups at varying price levels. Each of the constructions outlined below includes all the essential components required to create a straightforward, climate-controlled environment for your marijuana plants.
All the equipment required for these projects can be easily purchased online or acquired from a local hardware store or specialized grow shop.
Selecting the Ideal Grow Room Size
The Importance of Lighting
If an interruption in the expected nighttime conditions occurs, the cannabis plant can suffer, leading to a bad production of buds or the lost opportunity of an amazing harvest.
If the lighting scheduling is irregular, the plant can get stressed and show different problems, for example a poor development. Having a dark room for growing cannabis is a priority.
To avoid any interruptions to the lighting schedule, evaluate whether your plants might be exposed to ambient light from sources such as doorways, windows, or exterior cracks. Check for any sources of light leakage by taking a moment to observe the room in complete darkness.
Cover any visible light sources, and pay close attention to the possibility of glowing power strips, digital clocks, or any other devices emitting passive light.
LED vs HID Grow Lights
When Light Emitting Diodes (LED) grow lights were introduced on the market, the community of cannabis growers started a discussion to distinguis if LED lights are better than the classic High-Intensity Discharge (HID) lights. The response to this question varies based on your objectives.
To determine the most suitable option for your needs, it is beneficial to examine the technology underpinning LED grow lights when compared to HID grow lights. When evaluating HID and LED grow lights, it is also essential to take into account other types of HIDs, such as MH and CMH lights.
Light Spectrum and Intensity
Light Spectrum and Intensity are two technologies that represent distinct styles for producing light. HID bulbs enclose inert gas inside their glass housing, while LEDs operate on solid-state technology.
The HIDs generate a substantial amount of heat, with a significant portion of their emissions falling within the infrared (IR) and ultraviolet (UV) spectrum. LEDs emit light within a narrow segment of the visible light spectrum and use energy efficiently without generating excessive heat and non-visible electromagnetic radiation.
This complex topic becomes even more intricate due to the existence of various forms of light radiation. Light sources emit energy across a spectrum of light, which is quantified by different wavelengths. Human vision is limited to perceiving only a portion of these wavelengths, rendering those beyond our visual range essentially ineffective for practical purposes.
HID lamps not only exhibit lower luminous efficacy but are also restricted to emitting light within the visible spectrum perceivable by the human eye.
In contrast, LEDs excel in energy efficiency while significantly enhancing the quality of light output. Consequently, LEDs require fewer lumens (approximately one-third less) compared to HIDs to deliver superior-quality illumination. This concept is commonly referred to as lighting efficiency, or sometimes, wall-plug efficiency.
Some LED lights say that they produce less lumens than a HID Light, this point is possible. However, it’s important to note that the lumens emitted by LEDs are much more valuable because they fall within the range detectable by the human eye. On the other hand, the HID lights can produce more lumens but are not viewable by the human eye.
Ventilation and Airflow
Fresh air is important for cannabis plants primarily due to the process of photosynthesis. Adequate airflow plays a principal role in optimizing the photosynthesis efficiency of your cannabis plant, because the plant converts light, carbon dioxide, and water into essential nutrients.
Through respiration, the cannabis plant obtains oxygen and glucose to generate energy, this causes the plants to have healthy growth and development for robust and strong buds. This process is essential in the vegetative season and in the flowering time of the plant.

Furthermore, carbon dioxide is a vital requirement for your plant’s survival. Stale air can lead to a depletion of carbon dioxide over time, potentially suffocating your plant. To avert this, proper ventilation becomes indispensable, simulating the natural outdoor air circulation.
Inadequate air circulation can result in carbon dioxide accumulating in some areas while other parts lack the necessary concentration, leading to uneven growth and reduced yields. Therefore, effective air circulation ensures even distribution throughout your growing space.
When the grow room does not have fresh air or a well-ventilated growing environment, your plant could be at risk of starving because it does not have the ability to absorb the necessary nutrients it obtains from the soil or irrigation. This can make processes such as photosynthesis and respiration, which are vital for their survival, difficult.
Proper Air Circulation
Making sure you have adequate air circulation is a vital step for preparing your in-home garden. To acheive the proper air circulation for your marijuana plants, it is necessary to add exhaust and intake fans to your grow room. The fans, in conjunction with the appropriate extractors, will ensure adequate air circulation for the crops. Furthermore, if we add filters that help remove dirty air, you will have the holy grail of ventilation.
The Importance of Carbon Filters
The cannabis plant possesses a distinctive aroma, but not everyone finds it appealing. In order to conceal its scent, the use of carbon filters is necessary. Carbon filters are important in the ventilation system of a cannabis cultivation room.
The filter is an effective way to eliminate unwanted odors and gasses from the atmosphere, thus maintaining a clean and fresh environment within the grow room.
Carbon filters operate by utilizing activated carbon, a form of carbon treated with oxygen to create numerous tiny pores between carbon atoms. These pores have the capacity for absorbing the gasses and odors that the cannabis plant in the room emits.
When air passes through the carbon filter, the activated material absorbs these unwanted molecules, trapping them within its pores. This process removes bad odors and gasses from the air, resulting in cleaner, fresher air discharge through the filter.
Be sure to to select the appropriate size and type of carbon filter in relation to the size of your grow room. The filter size responds to the CFM (Cubic Feet per Minute) rating of your exhaust fan, ensuring thorough and effective air filtration within the grow room.
Replace the carbon filter periodically the as the carbon will become saturated over time, diminishing its effectiveness. Carbon is a dense material—just one gram of it boasts a surface area of 3000 square meters, making even small carbon filters highly effective at masking the scent of cannabis.
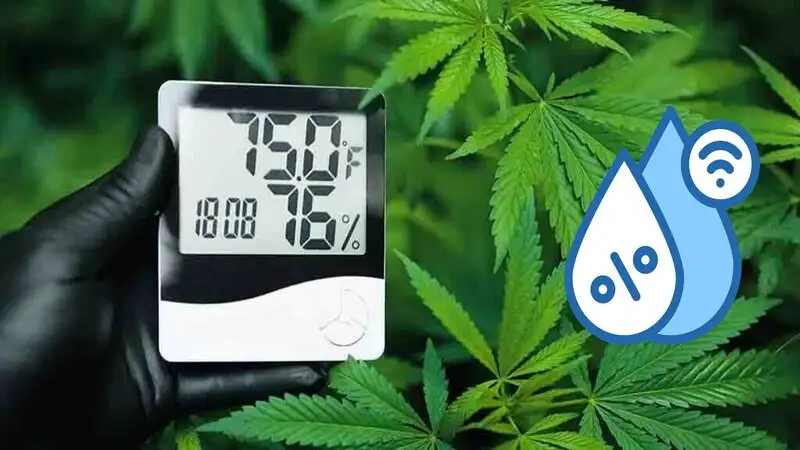
Temperature and Humidity Control
Cannabis plants require two essential factors: humidity and temperature. You can have a grow room set up with the best system but if you do not regulate the appropriate temperature, everything will be for nothing.
Cannabis plants require temperatures similar to those of humans, therefore, exposing them to temperatures that are too high or too low should be avoided. In relation to the environment, it cannot be too humid or too dry, just a balance similar to what people need.
Ideal Temperature Range
There are different temperatures for cannabis plants depending on the moment they are in. For this reason, you must imitate the temperatures in the growing location as they would occur in the natural environment.
An acceptable temperature range for weed plants is between 20°C and 28°C or between 68°F and 82°F when the lights in the grow room are on. When it comes to nighttime temperatures, cannabis plants prefer slightly cooler temperatures. Below we share the relevant information about the temperatures for each phase of plant cultivation.
Warmer temperatures are perfect for weed seedlings and should range between 20°C and 28°C or 68°F and 82°F. Additionally, breeders must ensure that the humidity is not too low.
The specimens can be seedlings or young plants, and they will be in a vegetative state. This point is of real importance in non-autoflowering plants, since their light/dark cycle is usually established at 18 hours of light and 6 hours of darkness.
As we already noted, cannabis plants grow optimally in slightly warmer temperatures, ideally between 20°C and 28°C (68°F to 82°F) during the phase described above.
When plants are in a more advanced vegetative phase they can withstand higher daytime temperatures, ranging between 20 °C and 30 °C (68 °F to 86 °F). However, care must be taken if temperatures exceed 28°C (82°F), because poor ventilation can generate stress in the plants, subsequently causing problems in the crop and harvests.
For flowering, cannabis plants must have a temperature range of 18°C to 26°C (65°F to 80°F), which allows optimal development of the buds. Larger buds can grow within that temperature range, improving the production of terpenes, generating buds with denser structures, more colors, and somewhat more intense aromas.
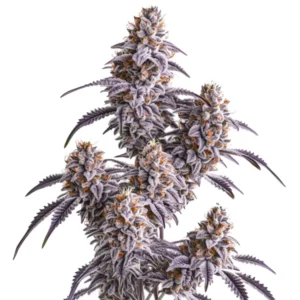
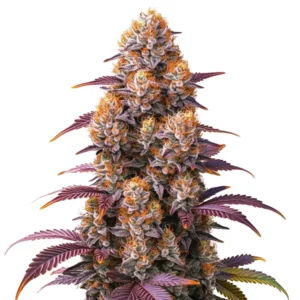
Some growers lower the temperatures indoors to induce purple colors in the plants. If you are looking to produce purple buds it is recommended to decrease the temperature by 8-10° when the plants sleep, a technique that can be useful with some specific genetics.
High temperatures above 28°C (82°F) can cause a decrease in potency and cannabinoids and even evaporate terpenes. If you want to have healthy buds, it is best to maintain temperatures between 18°C and 27°C (64°F and 80°F) during the day, and at night decrease to no lower than 15°C (60°F).
Managing Humidity Levels
Humidity control when growing cannabis is vitally important for plants. Generally, cannabis plants in the growth phase benefit from more humidity than when they enter the flowering phase.
Although this is generic data, keep in mind that the humidity level depends on the genetics being grown. Here at Blimburnseeds.com we usually sell mostly hybrid genetics since they have part indica and part sativa genetics, therefore, it is necessary to study each strain to determine what levels of humidity they require.
Sativa genetics, due to their more open structure and spongier buds, tend to withstand humidity better. Since these plants are more compact, they are more likely to be affected by fungi such as mold, which is produced by the high humidity. Humidity between 55% to 65% is recommended.
Seedlings: In the case of young plants, a humidity level between 65% and 70% is recommended. While the temperature should be maintained between 20°C to 25°C (68°F to 77°F), with a minimum dark period temperature of 20°C (68°F).
Vegetative Stage: Plants in this phase are already developing, therefore, humidity can decrease between 55% to 65%. For thie stage, the temperature can rise gently between 26°C and 28°C (78°F and 82°F) during the day and not less than 18°C (64°F) at night.
Flowering stage: Cannabis plants typically perform better with lower humidity levels during flowering to avoid mold problems. While there is no perfect range, it is advisable to reduce relative humidity to around 40% to 55%, favoring the lower end during late flowering. Temperature ranges between 20°C and 26°C (68°F and 78°F) are suitable.
Selecting the Best Cannabis Strains for Indoor Cannabis Growth
The individual preferences and objectives of each grower are the main influence in obtaining the best cannabis seeds for indoor cannabis cultivation. Some cannabis genetics such as autoflowering strains are perfect for beginner growers since there is no need to change the hours of light and their compact size and speed make them easy to grow.
Feminized cannabis seeds are ideal for those people who do not want male plants in their indoor cannabis cultivation.
The primary characteristic of feminized seeds is that they deliver female plants, ensuring good harvests. Regular weed seeds will deliver female and male plants which allowes you to select parents for the breeding of new specimens or genetics. To ensure great buds and good harvests, the separation of male plants from female plants is required so that the male plants do not pollinate the female plants.
Preparing Your Growing Medium
Cannabis growers will have different preferences when it comes to growing depending on their operation. The choice of growing medium will depend on the interest of each grower, some prefer to grow in hydroponics while others grow the classic way in substrate.
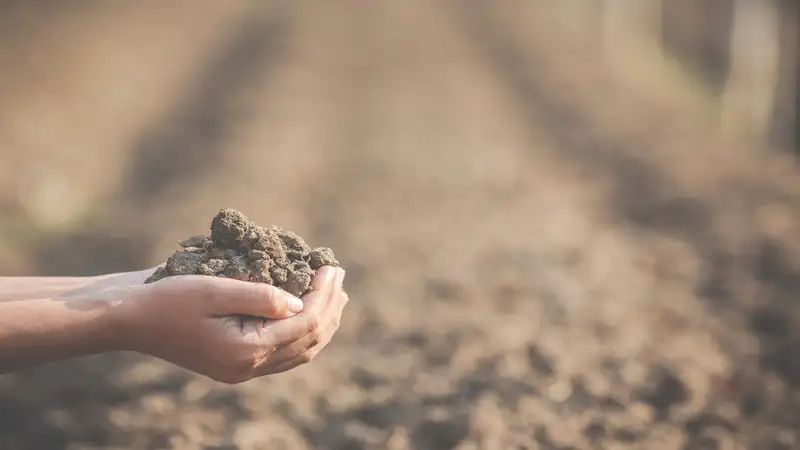
If you are looking to grow the classic way, here are the supplies, equipment, and instructions you need to create your own growing medium for a successful harvest.
Supplies:
Start by clearing a spacious area in your garden or garage and lay down a large tarp to prevent material loss. Next, build a pile of base soil or compost in the center. Use a rake to spread a layer of organic earthworms on top and cover it with another layer of base soil. Then, add the bat guano and more base soil.
Continue adding layers of the super soil ingredients, followed by a final layer of base soil, until you’ve used all the components. Use a shovel to thoroughly mix the ingredients until you achieve a homogeneous substrate, which should take about 20 minutes (and some physical effort). Finally, load the mixed soil into large plastic buckets or trash cans for storage or use it immediately in your indoor garden.
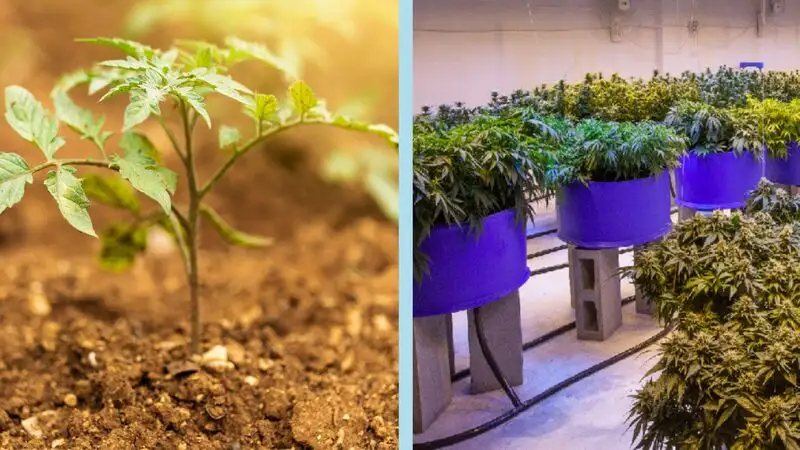
Soil vs Hydroponics
There are several methods available for growing cannabis today. However, there are two forms of cultivation that are the most popular among weed breeders, which are soil cultivation and hydroponic cultivation. For these two methods, there are different techniques for their successful application, to ensure good production.
Plants grown in soil obtain from the substrate the nutrients they need, such as amino acids or minerals, and microorganisms help with this function. Unlike, in hydroponic crops the plants obtain nutrients from the water in which the roots live and expand and thanks to the periodic nutrition from which they benefit.
Both hydroponic cultivation and soil cultivation require certain specific techniques.
Cannabis growing process
First of all, we must tell you that cannabis plants go through different stages during their life cycle where they require different amounts of water, light and nutrients, among other factors. It is good to know these phases of the cannabis plant in order to avoid making mistakes during cultivation.
Being clear about the cultivation processes is essential and here we are going to tell you what each of them is like and what you should do.
Germination and Seedling Care
The germination and seedling stage are two critical moments in cannabis cultivation, which is why in this part of the guide we explain it to you in depth because it is essential to have knowledge of this. Care in both the germination phase and seedling phase is essential to ensure an optimal cultivation process to obtain great results.
Germinating Cannabis Seeds
Seed germination is one of the most important processes when growing cannabis. Germination begins when the seeds absorb the water that is applied to them for the explosion of the embryo that is inside them.
Once the embryo releases the first root, the cannabis seed can be placed in the substrate or in the medium used to grow. Germination is the process by which cannabis goes from seed to seedling.
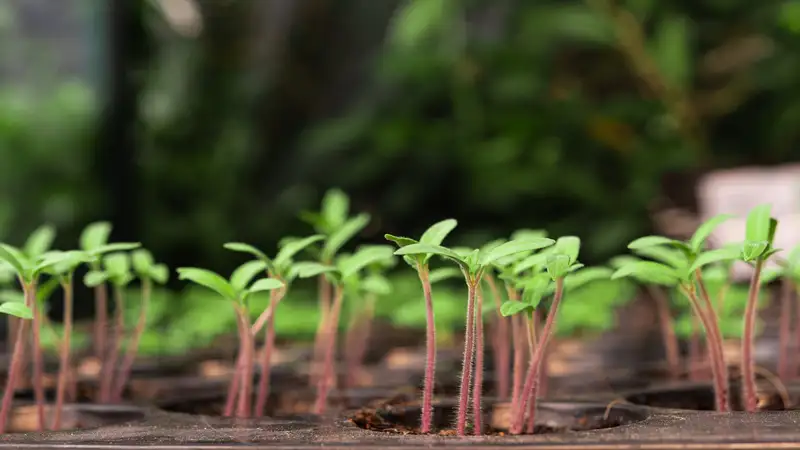
Caring for Young Seedlings
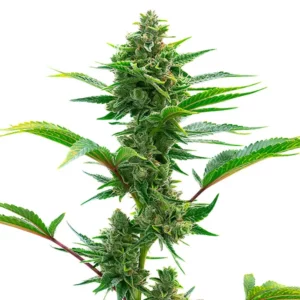
When marijuana plants reach the seedling phase, you will see the plant begin to produce its first leaves, showing a momentary maturation when it reaches between 5 and 7 leaves to continue its development in the vegetative stage.
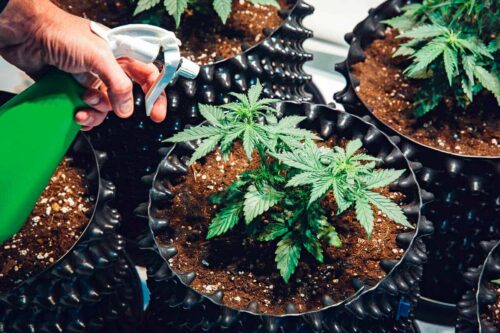
Cannabis specimens are considered seedlings when they begin to develop the first fan-like leaves and when they have already developed all those leaves, it means that said time has passed. During this period, the seedlings do not require much water, so avoid overwatering to avoid damaging the roots.
Take care of the seedlings from excess humidity and avoid exposing them to fungi such as mold, among others. Also, you must make sure that it receives a sufficient amount of light.
In relation to the necessary lighting, we recommend that you start your indoor cannabis cultivation with regulated, low-intensity lighting when the seedlings are small and then, for a couple of weeks (3 or 4), provide the stable and continuous lighting that the plants require to grow.
Vegetative Growth Stage
This phase begins when the cannabis specimens are small seedlings, which are attached to the seeds and after that, they are released from the shell, leaving only the 2 cotyledons visible. Through the cotyledons in the first days of life the plant is fed and then gives way to the appearance of the first leaves.
When the plant has passed the first weeks of life, the appearance of different arms and leaves is seen, which shape the structure of the plant together with the central stem.
As it progresses in its vegetative process, you will see how the leaves become larger, taking up a large space in the crop. The lateral branches become thicker and longer and the central stem spikes upward.
Different cultivation techniques should be used during this stage phase such as apical pruning, low-stress training, among others that we will explain to you later in this guide.
Providing the Right Light Cycle
As we know, cannabis plants require certain light cycles as photoperiodic plants. However, autoflowering plants grow and flower independently of light cycles. So photoperiodic genetics such as feminized, regular, fast version or F1 cannabis seeds require light cycles in the vegetative stage of 18 hours of light and 6 hours of darkness to have optimal development.
Keep in mind that in the first weeks when the specimen is a seedling, it cannot be directly exposed to light because it will stress them out and put the entire growing process at risk. Therefore, it is good to leave them on the side of the grow room or protected under the largest leaves of mature plants in case you have other plants in the garden.
Regarding autoflowering cannabis genetics, it is recommended to apply light cycles of 20 hours and 4 hours of darkness during growth and flowering periods. Remember that this type of plant does not depend on a photoperiod to begin to flower, since they do so automatically, hence the name autoflower.
However, we must also remember that at least during the first week of life the autoflowering plant should avoid direct lighting in indoor cannabis cultivation or with the sun outdoors. The above is recommended to avoid stressing the plant since they are usually highly sensitive to light duirng the early stages of the growing process.
Pruning and Training Your Plants
During the vegetative stage of cannabis, the growth of the plants is expressed in all its splendor. It can last between 3 and 16 weeks, however, indoor cannabis gardeners usually give the plants between 4 and 5 weeks of growth to optimize them. For more details on cultivating specific strains quickly, check out our guide on how to grow Star Killer Fast Version.
Transplants can be removed when the seedlings are barely between 2 and 3 weeks old. If you want to do a longer crop you can take an average of 8-10 weeks for the vegetative stage and carry out the transplant in week 4 or 5.
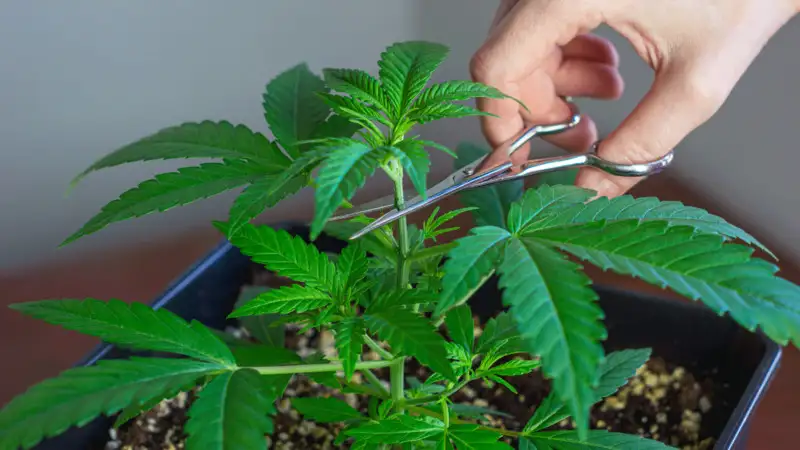
Apply pruning techniques such as FIM or Apical and Low Stress Training (LST) between weeks 3 or 4 of growth. Some experts even take advantage of the last stretch of the plants at the beginning of flowering to optimize their crops, especially when techniques such as the SCROG method are used.
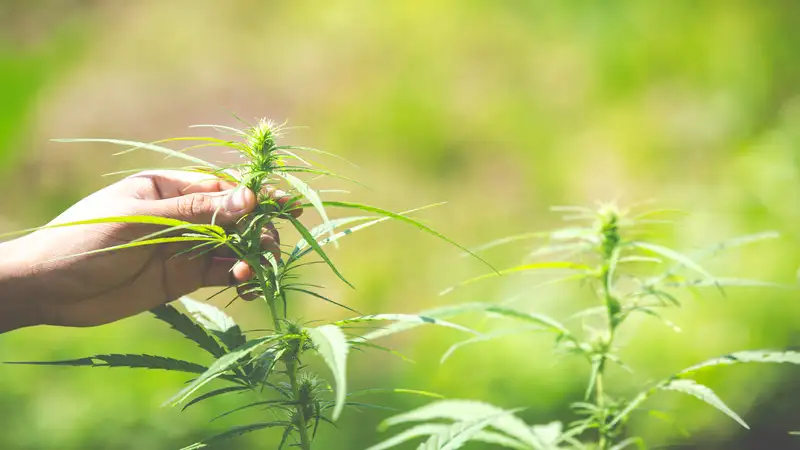
Flowering Stage
Once you change the light cycle from 18-12 hours of light and 12 hours of darkness, it can take between 7 and 14 days for a weed plant to move into the pre-flowering stage. At this point, you can determine the sex of the plant by examining the preflowers located at the nodes. As the plant progresses towards the final flowering stage, it becomes easier to identify its gender.
When you buy feminized cannabis seeds at Blimburnseeds.com you should not worry about trying to determine the sex of the plants because these are 100% feminized and here we guarantee the high quality and stability of the genetics purchased in our store.
Now, if you buy the regular seeds that we have in stock at Blimburnseeds.com you must keep in mind that you must know how to differentiate between male and female plants.
In female weed plants, you will notice that they produce pistils (the reproductive parts of a flower) that grow in buds (flowers that develop on the leaves, with a cluster on each side). Male cannabis plants produce small green sacs filled with pollen in the node areas.
Once the sacs of a male or intersex plant mature they open and release the pollen inside, pollinating nearby female flowers, which could potentially compromise the psychoactive potential of the female cannabis buds. If you do not want to make a new genetic strain or reproduce your plants we recommend eliminating the male cannabis plants from your crop.
Triggering the Flowering Phase
As we mentioned before, pre-flowering occurs before flowering and takes 1-3 weeks. After this process, the actual flowering phase begins. It is during flowering when the buds begin to develop and requires a series of specific nutrients.
When the buds are fully developed, you can think about harvesting. This occurs approximately between week 8 to 10 of flowering, depending on the type of genetics you grow. In the case of the purest sativa-type cannabis varieties, flowering can take 10-12 weeks or even longer.
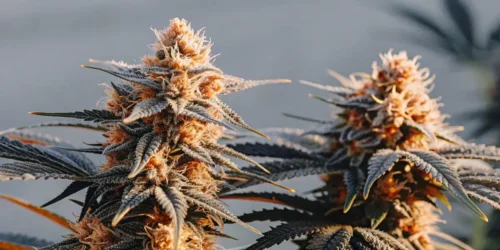
To determine if the cannabis plant is ready for harvest, observe the pistils of the cola buds, which will change from white to reddish orange and the trichome heads, will go from being transparent to a milky, opaque color and, finally, amber.
The amber hue means a higher ratio of CBD to THC cannabinoids are in the resin. The best time to harvest your cannabis plants is when the trichomes on the flowers and leaves have a cloudy white color, similar to when cloudy water comes out of the tap at home.
Nutrient Adjustments
Prior to flowering, we recommend using a flowering stimulant that can be applied 10 days before the photoperiod change and throughout the flowering stage. This stimulant significantly enhances the formation and emergence of new buds, as well as the production of cannabinoids (resin).
To prevent nutrient saturation or over-fertilization, we advise minimizing and gradually phasing out growth fertilizers as the flowering stage approaches.
The second phase of flowering corresponds to the 3rd-4th week in 6-week flowering varieties such as autoflowering or fast version genetics, and from the 4th week onwards in 8-week or longer varieties, such as feminized hybrid, indica, or sativa-leaning genetics, including regular varieties.
During this phase, you can begin using products designed to bulk up the buds, such as PK-rich bud boosters. There is also the option to supplement fertilization during this period with additives known for their high content of natural carbohydrates and sugars, which increase flower density and aroma.
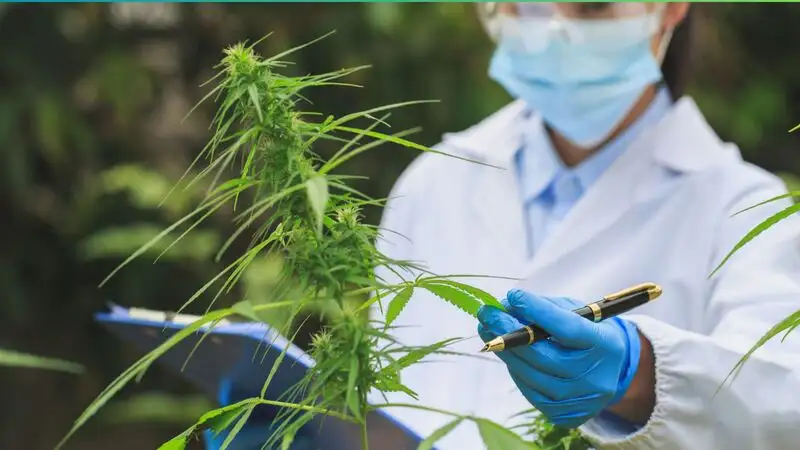
Monitoring Plant Health
Observing the trichomes during flowering is important because they are responsible for producing THC, terpenes, flavonoids, and other cannabinoids. As bud clusters develop, more cannabinoid compounds accumulate, causing the clusters to become resinous and sticky.
To keep the plant healthy at this stage and thus enhance the trichomes, you should try to have a clean growing room, free of all types of insects and pests that could harm the plant.
It is important that humidity is maintained at reasonable levels as indicated previously in this guide to avoid the appearance of mold and other fungi that destroy the buds of weed plants.
Additionally, temperatures are super influential to the growing process. Stay on track with the tempweratures listed in this guide for your plants to stay comfortable. Failure to do so can cause streess to the plant resulting in damage to the plant’s compounds such as terpenes. Stress to the plant can cause the loss of two essential qualities in cannabis specimens, flavor and aroma.
Since the plants use a lot of energy in this phase, we recommend watering with vitamins for weed plants. Doing so can supply micronutrients and specific minerals that the fertilizers, nutritional supplements, and even the substrate may lack.
Proper Harvesting Techniques
Another way to harvest is to cut the entire plant from the bottom of the central stem. This depends on the size of your plant. If the plant is small, it may be best to cut the entire plant at once and then trim the excess lateral branches.
If the plant is large enough, it is best to harvest the side branches and then proceed with the central stem. If you want to cut the entire plant at once, it is best to do so about 5 inches from the soil with a 45-degree cut.
Harvesting and Drying
To finish the cultivation there are two processes that are essential: harvesting and drying the buds. Each of these processes must be done with specific parameters and also following some steps to ensure success. Next, we are going to see what those steps are and how to carry out a successful harvest and drying so as not to ruin the flowers we obtain from the crop.
Timing the Harvest
When you harvest plants too early, the THC will not have fully developed. And if you harvest them too late, the THC will have started to break down and turn into CBN.
Therefore, to get the maximum possible amount of THC and strongest effects, you must harvest at the right time. To know when to harvest, you must pay attention that when you buy marijuana seeds, each weed genetics has its technical information regarding the indicated time for harvesting.
When you grow indoors cannabis, you have to keep in mind that it can be harvested after a few days of flowering, which is generally 60 to 90 days or it is also listed in weeks, which generally ranges from 8 to 10 weeks, depending on the genetics you cultivate.
For outdoor crops, you should consider that plants are generally harvested in late August or mid-September in the northern hemisphere. As we already pointed out previously, analyzing the istyles and trichomes with their respective colors is also an effective way and is probably the best way to determine when to harvest a cannabis plant correctly.
Drying and Curing Cannabis Buds
The quality of the buds in terms of effect, flavor, and aroma will also depend on the drying of the flowers. Here, we will review some fundamental concepts to ensure great drying:
Marijuana buds are dried from the outer layers inwards. A good dose of patience is needed to guarantee optimal quality of your cannabis. That is why it is good that the buds dry for a minimum of 10 to 15 days. Accelerating this process can cause a loss of cannabis quality.
To check if your weed has dried correctly, you can gently squeeze a bud, which should feel dry on the outside with a relatively low humidity inside without crumbling. If the flowers have a flexible or elastic-like consistency, continue drying them for a longer period.
Another way to check if your buds are dry is to bend a branch. If the branch cracks and remains bent, the buds are ready. However, if the branch does not crack and returns to its original shape, give them a little more time to dry.
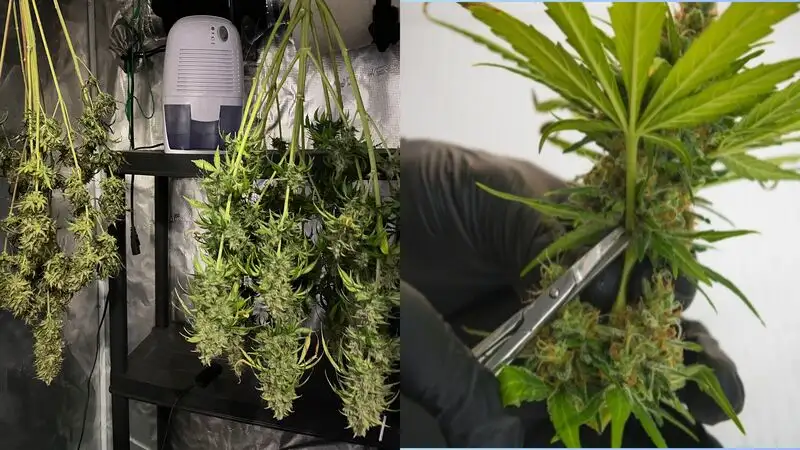
To dry the plant you can use the classic technique of cutting the plant at the bottom of the main stem and hanging it upside down from a cord or clothesline.
You can also hang the plant by its branches if you prefer or if the plant is large. In this way you will achieve a uniform drying process while preserving your buds’ natural shape because they do not have contact with any surface.
There are also vertical dryers and stackable dryers. If you decide to use a dryer you must first manicure your plants tobe able to put them in the dryer without them touching. You should also move and rotate the buds every 2 or 3 days to prevent them from flattening or losing their shape when they come into contact with the dryer mesh.
Marijuana buds can take 3 to 4 weeks to cure depending on the ambient relative humidity and temperature of the curing site. During this time, the chlorophyll of the flowers degrades and the THC goes from the acidic state (THC-A) to the psychoactive side that we like so much, THC. Avoid exposing the buds to light during the curing period.
You can cure your buds without problems in airtight glass containers lined with some cloth or paper on the outside to prevent light from penetrating inside. You can also use wooden boxes which help absorb moisture from the flowers.
Be careful in the first weeks because the buds continue to release moisture, which can damage the harvest, which is why it is recommended to open the glass container or wooden box frequently and carefully, extract the flowers so they can breathe and release their moisture.