Planting Clones: A Proven Path to Thriving Cannabis Growth

Planting Clones for a Successful Start
Planting clones opens up possibilities for consistent and reliable cannabis growth. When done correctly, it ensures that your cannabis plants start strong, rooted, and ready for a successful lifecycle. Many growers face challenges with planting clones, whether it’s finding the right conditions or selecting the ideal medium. Taking the time to understand the fundamentals will set you on the path to robust growth.
Successfully planting clones requires attention to detail from the start. By establishing a healthy environment and providing the proper care in early stages, you create a foundation that gives your clones the best chance to thrive. In this guide, you’ll find key steps to mastering planting clones, from choosing the right tools and setup to nurturing your plants through every stage.
Recommended Strains
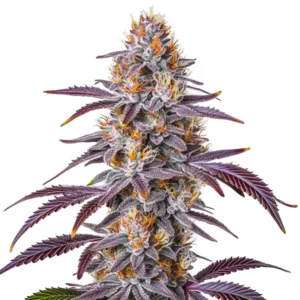
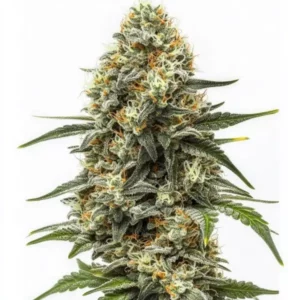
Banana Cream
|
|
THC | 28% - 30% (High) |
|
|
Type | Feminized |
|
|
Yield | Medium |
|
|
Phenotype | 70% Indica / 30% Sativa |
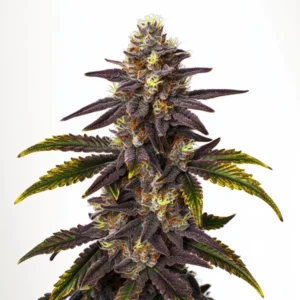
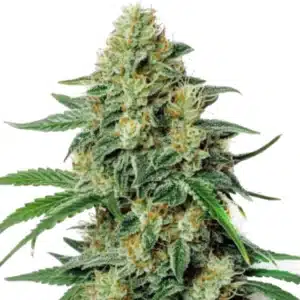
Banana Kush
|
|
THC | 17% - 21% (Medium) |
|
|
Type | Feminized |
|
|
Yield | High |
|
|
Phenotype | 60% Indica / 40% Sativa |
Promos & Deals

Preparing Your Grow Area for Planting
The first step in planting clones is setting up a dedicated grow area with the ideal conditions. Clones are sensitive to their environment, and a stable setup goes a long way toward establishing healthy growth. A well-prepared grow area ensures clones receive consistent care, free from sudden changes that could impact development.
Essential Tools and Supplies for Clone Planting
A successful clone planting process begins with the right tools and supplies. Basic items include clean, sharp scissors or a blade, rooting hormone for healthy root formation, and suitable grow trays or pots for stability. Ensuring that you have quality soil or growing medium, a pH meter, and a thermometer is also essential to maintaining optimal conditions.
A humidity dome can help sustain moisture levels, especially during the first few days when clones are most vulnerable. Keeping these items on hand streamlines the planting process and reduces the likelihood of shock or transplant stress, setting up your clones for success.
Setting Up Ideal Lighting, Temperature, and Humidity
Creating an ideal environment for planting clones requires managing light, temperature, and humidity. Clones need gentle, consistent light, typically 18 hours of light and 6 hours of darkness. Low-intensity lighting, like fluorescent or LED lights, works well, as intense lighting can cause stress in young plants.
Temperature should remain stable, ideally between 70-75°F (21-24°C), with humidity levels around 70-80% for the first week. A high-humidity environment is essential, as it allows clones to take in moisture through their leaves while roots develop. Using a humidity dome helps maintain this environment and prevents clones from drying out too quickly.

Choosing the Right Medium for Clones
Selecting the appropriate growing medium is a vital part of planting clones. The medium impacts everything from nutrient delivery to root structure, and each type of medium comes with its own benefits. The most common options include soil, hydroponics, rockwool, and coco coir, each offering unique qualities.
Soil vs. Hydroponics: Which Is Best for Clones?
Soil and hydroponics are two popular mediums for planting clones, each with distinct advantages. Soil is a traditional choice that provides a natural buffer for nutrients, making it a forgiving option, especially for new growers. Soil mixes designed for cannabis are often enriched with beneficial microbes that support root health.
Hydroponics, on the other hand, allows clones to grow without soil, relying on water and nutrient solutions to nourish the roots. This method enables faster nutrient uptake, leading to potentially quicker growth and higher yields. However, hydroponics requires precise control over pH and nutrient levels, making it better suited for growers with some experience.
Pros and Cons of Rockwool, Coco Coir, and Soil
Rockwool and coco coir are two other popular choices for planting clones, each with specific benefits. Rockwool, made from spun volcanic rock, retains moisture well and provides excellent aeration for roots, but it requires careful pH management. It is a sterile medium, which minimizes the risk of pests and diseases, a major advantage when planting clones.
Coco coir is an organic option made from coconut husks, offering excellent water retention and aeration. It’s highly sustainable and easier to manage in terms of pH compared to rockwool. Coco coir works well for clones because it holds moisture effectively without drowning roots, giving them a balanced environment to grow.
Planting Techniques for Healthy Clone Growth
Using the right techniques when planting clones encourages healthy, consistent growth. Each stage, from placement to watering, impacts how well clones adapt and develop. By following tried-and-true techniques, you can help your clones establish strong roots and begin to thrive.
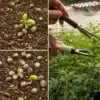
Steps to Planting Cannabis Clones
Start by preparing your chosen medium and creating a hole slightly larger than the clone’s stem. Gently place the clone in the hole, taking care not to damage the roots. Positioning is key, make sure the clone sits securely in the medium but avoid burying it too deeply, as this can hinder stem and root growth.
After placing the clone, lightly press the surrounding medium to hold the stem in place. This stability helps the roots make firm contact with the medium, which encourages quicker establishment. Ensuring that clones are well-positioned within the medium is one of the most effective steps in achieving healthy growth after planting clones.
Watering Techniques for Newly Planted Clones
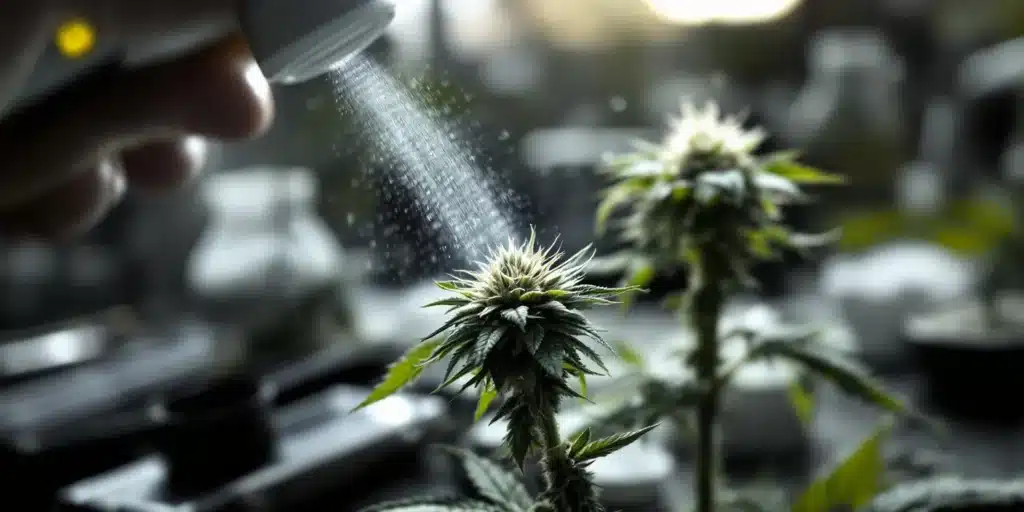
Watering is crucial for freshly planted clones, as they need moisture to develop roots and avoid drying out. It’s best to water lightly, ensuring the medium is moist but not soaked. Overwatering can cause root rot, especially before roots are fully established, so keep water levels balanced.
Use a spray bottle to mist the clones initially, as they absorb moisture through their leaves in the early stages. Gradually transition to more conventional watering as the roots establish. Careful watering practices set the stage for healthy, resilient growth, preventing stress and ensuring the plant’s needs are met.
Establishing a Nutrient Schedule for Clones
Nutrient management is an essential part of planting clones, as young plants require specific elements for root and foliage growth. Setting up a balanced nutrient schedule ensures clones get what they need to thrive without overwhelming them with too many additives.
Essential Nutrients for Root Development
Healthy root development in clones depends on the right balance of nutrients, particularly phosphorus and potassium, which encourage root growth. Nitrogen, while important for foliage, should be applied sparingly at first to avoid overwhelming the young plants. Rooting solutions with mild levels of nutrients can provide the essential elements without risking nutrient burn.
Calcium and magnesium are also crucial, as they support cell structure and chlorophyll production. Many growers incorporate a diluted, balanced nutrient solution in the early stages, allowing the clone to absorb nutrients gradually as roots develop and strengthen.
Setting a Balanced Fertilization Plan for Young Clones
Creating a fertilization plan helps you avoid nutrient excess or deficiency, both of which can stunt clone growth. Start with a quarter-strength solution of your chosen nutrients, and gradually increase as the clone shows signs of established roots and active growth. Avoid heavy feeding until the plant is well-rooted, as clones are particularly sensitive to nutrient concentrations.
Monitor the pH of both your medium and nutrient solution to ensure they stay within the ideal range (5.5-6.5 for hydroponics and 6.0-7.0 for soil). Proper pH ensures that nutrients remain available for uptake, which supports steady and predictable growth.
Managing Environmental Conditions Post-Planting
After planting clones, maintaining optimal environmental conditions is essential for healthy growth. Clones are sensitive to fluctuations in temperature, humidity, and light intensity, so careful management of these factors supports robust development and reduces stress. Providing the right environment ensures that your clones transition smoothly from the rooting phase to active growth.
Temperature and Humidity Control for New Clones
Temperature and humidity levels play a major role in clone health, especially right after planting. New clones need warmth and high humidity to prevent drying out and to encourage root growth. Too much or too little of either can cause clones to wilt or struggle to establish.
Optimal Temperature Range for Rooting Success
For newly planted clones, the ideal temperature range is between 70-75°F (21-24°C). Temperatures below this range can slow root development, while temperatures above may stress the plant. Using a thermometer to monitor the grow area allows you to keep conditions stable. If temperatures drop, consider a gentle heat mat under the growing tray to maintain warmth.
Providing consistent warmth accelerates root growth, ensuring clones adapt to their new environment quickly. Many growers find that maintaining even a slightly warmer temperature (around 75°F) is especially beneficial during the initial stages of planting clones.
Using Humidity Domes to Prevent Clone Stress
Humidity domes are invaluable tools for maintaining the high humidity levels young clones need. Newly planted clones absorb most of their moisture through leaves since root systems are still forming. Using a dome keeps humidity high (around 70-80%) and prevents clones from drying out too quickly. Mist the inside of the dome lightly to maintain moisture, but avoid over-saturation, which could lead to mold.
Remove the dome periodically to allow fresh air in and reduce the risk of mold or mildew. As roots begin to establish, gradually reduce humidity by lifting the dome for longer periods each day. This step acclimates clones to a standard grow environment, preparing them for stronger growth outside the dome.
Light Requirements for Freshly Planted Clones
Light is essential for clone development, but finding the right balance is key. Too much light can stress clones, while too little can slow their growth. By providing gentle, indirect light, you create the perfect conditions to support steady, healthy development in newly planted clones.
Recommended Light Intensity and Duration
Newly planted clones benefit from 18 hours of light and 6 hours of darkness, a schedule that encourages vegetative growth without overwhelming them. Low-intensity lighting, like T5 fluorescents or LED grow lights, provides sufficient light for clones without causing stress. High-powered lights, such as HPS, can be too intense initially and may lead to light stress or burning.
Keeping lights on this balanced schedule supports a smooth transition from the rooting phase to active growth, giving clones the energy they need to establish themselves. Using a timer ensures consistency, allowing your clones to establish a natural rhythm that promotes strong development.
Adjusting Light Distance to Encourage Growth
Maintaining the proper distance between lights and clones is important to prevent heat stress. Keep lights approximately 12-18 inches away from clones to provide sufficient light without overheating. For LED lights, adjusting according to the specific light’s intensity may be necessary, as some LEDs can be more intense even at a distance.
As the clones grow, gradually decrease the light distance to encourage compact, bushy growth rather than excessive stretching. Adjusting light distance as clones develop helps them adapt to higher light levels without causing stress, promoting a healthy structure from the start.
Caring for Clones Through the Early Growth Stages
Once your clones are securely planted and acclimated to their new environment, ongoing care becomes essential for healthy, vigorous growth. Maintaining a consistent routine with adjustments as needed allows clones to transition smoothly into robust, mature plants. During these early stages, regular monitoring and attention to nutrient intake, hydration, and environmental stability are key.
Monitoring Growth and Adjusting Nutrients
Early-stage clones are sensitive to nutrient levels, so introducing nutrients slowly is vital. Watch for signs of nutrient deficiency or excess, as these can be early indicators of necessary adjustments. Clones generally require only a light nutrient mix during their first weeks, focusing primarily on root development and overall plant stability.
As clones progress and root systems develop, gradually increase the nutrient strength, keeping a balanced ratio of nitrogen, phosphorus, and potassium. Nitrogen promotes foliage growth, while phosphorus and potassium support root health and structural strength. Monitoring growth ensures you’re meeting the clone’s needs without overwhelming them with excessive nutrients.
Keeping a Consistent Watering Routine
Watering plays a vital role in clone health, particularly in the first few weeks after planting. Newly planted clones need a consistent, balanced approach to hydration, too little water can lead to dehydration, while overwatering can cause root rot. Aim to keep the growing medium slightly damp rather than soaking wet.
Regularly check the moisture level of the medium by gently pressing the top layer. Water clones lightly when the surface feels dry to the touch. As the roots strengthen, you can increase the watering volume gradually. A stable watering routine creates a foundation for healthy growth, supporting the clone’s resilience and overall structure.

Preventing Common Issues in Early Clone Development
Newly planted clones are particularly susceptible to environmental and biological stressors. By keeping a close eye on their health and responding quickly to any changes, you can prevent common issues that often impact clone development. Addressing these issues proactively will save you time and ensure that your plants stay on a path toward steady growth.
Identifying Early Signs of Stress
Stress can present itself in several ways, from wilting leaves to discoloration. Yellowing leaves, for example, often signal nutrient imbalance, while wilting or drooping may indicate improper watering or low humidity. Keeping a daily log of your clone’s health can help you quickly identify unusual changes and adjust your care routine accordingly.
If you spot early signs of stress, make targeted adjustments, such as altering humidity levels, repositioning lights, or tweaking nutrient ratios. Observing and reacting to these changes minimizes long-term impact and helps your clones remain strong and healthy.
Managing Pests and Disease Risks
Cannabis clones can attract pests like spider mites, aphids, and fungus gnats, which can quickly impact their growth if not managed effectively. Inspect your plants daily, paying close attention to the undersides of leaves and the base of the stems. Regular inspections help catch issues early, preventing them from spreading to other plants.
Using natural pest deterrents, such as neem oil or insecticidal soap, can help control pests without damaging the clones. Maintaining cleanliness in the grow area also reduces the risk of disease. If clones are showing signs of disease or pest infestation, isolate them immediately to prevent contamination.
Transitioning Clones to a Larger Growing Space
As clones grow, they will eventually require more space to accommodate their expanding root systems and foliage. Knowing when to transplant them into a larger pot or grow area is essential for continued growth and productivity. A timely transplant minimizes root restriction and encourages further development.
Recognizing When Clones Are Ready for Transplant
Signs that clones are ready for transplant include visible root growth poking through the bottom of the container, increased foliage, and noticeable growth above the soil line. Generally, clones are ready for transplant about two to four weeks after planting, though this can vary based on strain and environmental conditions.
When preparing to transplant, choose a container that is at least double the size of the current one. This new space will give roots room to expand and support the plant as it moves toward its next growth phase. Transplanting at the right time reduces the risk of transplant shock and ensures your clone continues to grow steadily.
Techniques for a Smooth Transplant Process
To minimize stress during transplant, thoroughly water the clone a few hours before moving it. Gently loosen the root ball from the current container, being careful not to disturb the roots. Place the clone in its new pot with pre-moistened soil or medium, filling in gaps around the root ball to provide stability.
After transplanting, give the clone time to adjust by providing low-intensity light for the first day. Avoid heavy watering immediately after the transplant to prevent shock. A gradual return to the regular light and nutrient routine allows the clone to adapt to its new space, promoting a smooth transition into the next growth stage.