Cannabis Curing Humidity: Perfecting the Art for Optimal Results
When it comes to curing cannabis, one factor that can make or break the quality of your final product is humidity. Managing curing cannabis humidity correctly ensures that your buds retain their potency, flavor, and aroma while avoiding issues like mold or over-drying. Understanding how to lower humidity in curing jars can help prevent such issues. In this comprehensive guide, we’ll explore everything you need to know about curing cannabis humidity, offering tips, techniques, and insights to help you achieve the best possible results.
Promos & Deals
Why Humidity Is Crucial in the Cannabis Curing Process
Humidity plays a pivotal role in the cannabis curing process, directly impacting the quality and shelf life of your buds. Referring to a curing humidity chart helps ensure proper humidity levels, allowing the cannabis to slowly release moisture, preserve its terpene profile, and prevent harshness when smoked.
Why Humidity Matters When Curing Cannabis
Curing cannabis at the right humidity levels is essential because it influences the final product’s flavor, potency, and overall quality. If the humidity is too high, you risk mold growth, which can ruin your entire harvest. On the other hand, if the humidity is too low, the buds can dry out too quickly, leading to a harsh taste and reduced potency.
Maintaining the ideal humidity during curing allows the buds to break down chlorophyll slowly, which enhances the smoothness of the smoke and preserves the delicate terpenes that give each strain its unique aroma and flavor.
Recommended Humidity Levels for Different Cannabis Strains
Different cannabis strains may require slight variations in humidity levels during curing to bring out their best characteristics. Generally, a humidity level of 55-65% is recommended for most strains during the curing process. However, some indica strains may benefit from slightly higher humidity levels, around 60-65%, to maintain their dense structure and prevent the buds from becoming too dry. Sativa strains, which tend to have more airy buds, might do better in the lower range, around 55-60%, to avoid excess moisture.
Certain hybrid strains might require a more tailored approach, depending on their genetic makeup. For example, a hybrid with dominant sativa traits may need to be cured closer to the sativa humidity range to maintain its flavor and effects. Conversely, hybrids leaning towards indica characteristics might thrive better with higher humidity levels. The specific needs of your strain allows you to fine-tune the curing environment, ensuring that you maximize both potency and flavor.
Tools and Techniques for Monitoring Humidity During Curing
Accurate humidity control during the curing process requires the right tools and techniques. Using the proper equipment ensures that you can monitor and adjust the humidity levels as needed, preventing issues before they arise.
How to Use Hygrometers for Humidity Control
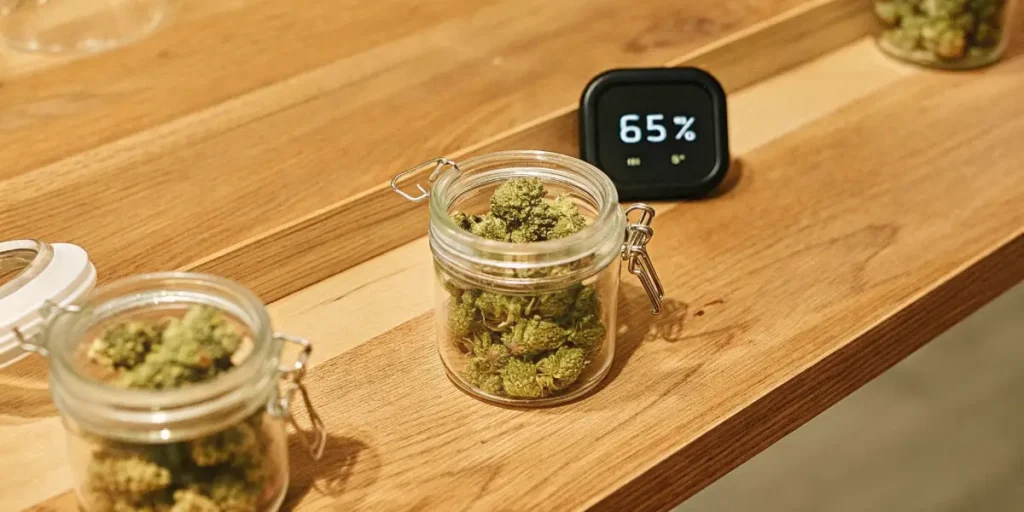
A hygrometer is an essential tool for any cannabis grower looking to control humidity levels during curing. This device measures the relative humidity in your curing environment, allowing you to make real-time adjustments to keep conditions within the ideal range.
Place a hygrometer inside your curing jars or containers to monitor the humidity levels. It’s a good idea to check the hygrometer daily, especially during the first few weeks of curing, as this is when most moisture will be released from the buds. If the humidity levels rise above 65%, you can “burp” the jars opening them for a few minutes to release excess moisture and restore the proper environment.
Controlling Humidity with Humidity Packs
Humidity packs are another effective tool for maintaining the best humidity to cure weed during the cannabis curing process. These packs are designed to regulate humidity within a specific range, typically around 58-62%, making them ideal for cannabis curing.
Simply place a humidity pack in your curing jar alongside the buds. The pack will absorb or release moisture as needed to maintain a consistent environment, reducing the need for frequent monitoring. This not only helps prevent issues like mold or over-drying but also makes the curing process more hands-off and reliable.
In addition to preventing extreme humidity fluctuations, these packs also help to maintain the integrity of your cannabis over time. By stabilizing the curing environment, they allow the terpenes and cannabinoids to mature gracefully, enhancing the final product’s overall quality.
Curing Jars in Maintaining Humidity
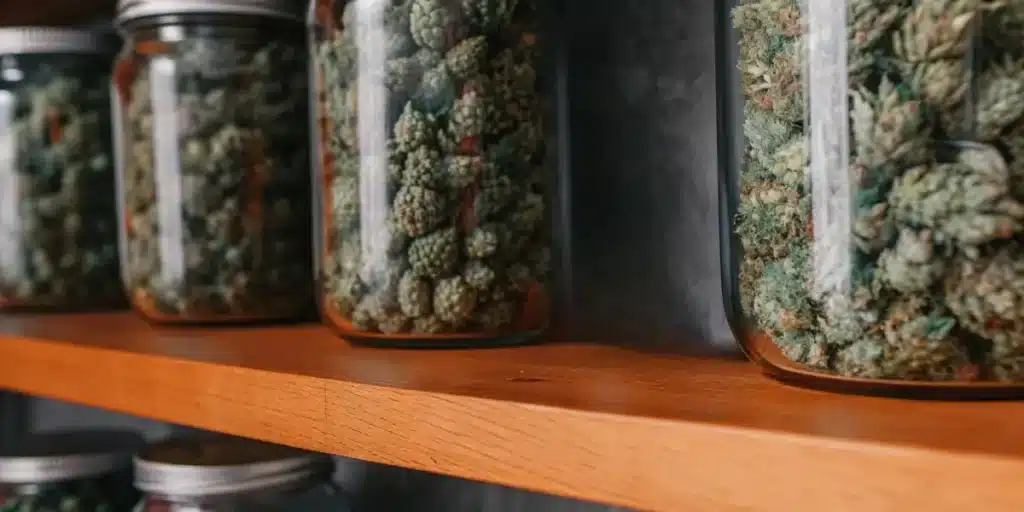
Curing jars, typically made of glass, play a significant role in maintaining the right humidity levels during cannabis curing. Glass jars are airtight, which helps to keep the moisture from escaping too quickly while also preventing external air from affecting the buds.
When using curing jars, it’s important to leave a small amount of headspace at the top to allow air to circulate around the buds. This air circulation is crucial for even drying and helps prevent mold growth. Combining curing jars with a hygrometer and humidity packs gives you precise control over the humidity levels, ensuring a smooth, flavorful final product.
The type of glass used in these jars also matters. Opt for high-quality, thick glass jars that can withstand the pressure of sealing without allowing air leaks. Some growers prefer using mason jars, while others might opt for specialized curing containers designed specifically for cannabis. Whichever you choose, ensure that the jars are thoroughly cleaned and sterilized before use to avoid contamination.
The Impact of Humidity on Cannabis Quality
The quality of your cured cannabis hinges on maintaining the right humidity levels. Too much or too little humidity can significantly affect the potency, flavor, and safety of your cannabis, making it essential to understand the impact of these variables.
How Excess Humidity Can Lead to Mold Growth
High humidity levels during curing can create a breeding ground for mold, which is one of the biggest risks to your cannabis crop. Mold not only ruins the flavor and aroma of your buds but also poses health risks to consumers.
To prevent mold, it’s crucial to keep humidity levels within the safe range of 55-65%. If you notice any signs of mold, such as white or gray fuzz on your buds, you’ll need to remove the affected areas immediately and lower the humidity in your curing environment. Regularly monitoring your curing setup with a hygrometer can help you catch humidity spikes before they become a problem.
In some cases, mold can be particularly insidious, forming inside the dense parts of the buds where it’s not immediately visible. This makes daily inspections during the early stages of curing essential. If mold does form, it can spread rapidly, so quick action is necessary to save the rest of your harvest. Using a dehumidifier in particularly humid climates can help keep the curing environment within the safe range, further reducing the risk of mold development. This is especially helpful when figuring out how to lower humidity in curing jars during challenging conditions.
The Dangers of Low Humidity: Risks of Over-Drying Cannabis
While high humidity can lead to mold, low humidity during curing can cause the buds to dry out too quickly. Over-dried cannabis loses its terpenes, resulting in a harsher smoke and reduced flavor. Additionally, the cannabinoids can degrade more rapidly in overly dry conditions, diminishing the potency of your product.
To avoid over-drying, ensure that the humidity levels don’t drop below 55%. If necessary, focus on methods to balance the environment after learning how to lower humidity in curing jars. If you find that your buds are drying out too quickly, you can use a humidity pack to reintroduce some moisture into the curing environment, restoring the balance and preserving the quality of your cannabis.
Over-drying can also affect the physical structure of the buds, making them brittle and prone to crumbling. This not only affects the aesthetics of your cannabis but also makes it more difficult to handle and package. For those looking to market their cannabis, maintaining the right humidity is crucial for retaining the product’s visual appeal and texture.
Balancing Humidity for Maximum Flavor and Potency
The key to curing cannabis effectively lies in balancing humidity levels to maximize both flavor and potency. Proper humidity allows the buds to cure slowly, which is essential for preserving the full spectrum of cannabinoids and terpenes.
By carefully controlling humidity, you ensure that your cannabis retains its potency and delivers a smooth, enjoyable experience. The curing process is where the true character of your cannabis comes to life, making humidity control a crucial step for any serious grower.
Balancing humidity is not just about avoiding extremes; it’s about finding that sweet spot where the buds can mature at a steady pace. This balance allows the complex chemical processes within the cannabis to unfold naturally, resulting in a richer, more potent product. Growers who master this balance often find that their cannabis stands out for its exceptional quality, making the effort well worth it.
Step-by-Step Guide to Curing Cannabis at the Right Humidity
Curing cannabis is a delicate process that requires careful attention to humidity levels. This step-by-step guide will walk you through the process, helping you achieve perfectly cured cannabis every time.
Preparing Your Space for Optimal Humidity Control
Before you begin curing, it’s essential to prepare your drying and curing space. This preparation ensures that you can maintain the correct humidity levels from start to finish.
Start by selecting a space that is cool, dark, and has good air circulation. The ideal temperature range is between 60-70°F (15-21°C), with a relative humidity of 55-65%. If your environment is too humid, consider using a dehumidifier to bring the levels down. Conversely, if the air is too dry, a humidifier can help maintain the proper conditions.
If possible, set up your drying space in an area with minimal temperature fluctuations. Sudden changes in temperature can cause condensation, leading to unwanted moisture on the buds. Using a hygrometer and thermometer to monitor the environment is essential. Make sure your curing jars or containers are placed in an area where they won’t be disturbed, as movement can disrupt the curing process and potentially lead to uneven results.
How to Adjust Humidity Levels During Curing
Once your cannabis is placed in curing jars, it’s time to monitor and adjust the humidity levels as needed. During the first week, check the hygrometer daily to ensure that the humidity stays within the desired range.
If the humidity rises above 65%, open the jars for a few minutes each day to release excess moisture. This process, known as “burping,” helps prevent mold growth by allowing fresh air to circulate. If the humidity drops too low, you can add a humidity pack to maintain the right environment.
As the curing process continues, you can reduce the frequency of burping the jars, but continue to monitor the humidity levels regularly. The goal is to maintain a consistent environment that allows the cannabis to cure slowly, developing its full flavor and potency.
Consider investing in automatic burping systems or curing containers with built-in humidity control for larger operations. These tools can help maintain optimal conditions without requiring constant manual intervention. For smaller batches, the traditional method of burping jars daily during the first few weeks is sufficient and allows for more direct control over the process.
Signs That Your Cannabis Is Curing at the Proper Humidity
Knowing the signs that your cannabis is curing at the right humidity is crucial for achieving the best results. Properly cured cannabis should feel slightly dry to the touch but not brittle. The buds should retain some sponginess when squeezed gently, indicating that they still contain a small amount of moisture.
The aroma of the buds should become more pronounced as the curing process progresses, with the terpenes developing their full profile. If your cannabis meets these criteria, it’s a good sign that the humidity levels are where they need to be.
Another indicator of successful curing is the gradual change in the color and appearance of the buds. As the chlorophyll breaks down, the buds may develop deeper hues, and the trichomes may appear more prominent. These visual cues, combined with the tactile and aromatic changes, signal that your cannabis is curing correctly and will result in a superior final product.
Troubleshooting Humidity Issues During Cannabis Curing
Even with the best preparation, you might encounter humidity-related issues during the curing process. Knowing how to troubleshoot these problems will help you maintain the quality of your cannabis.
How to Address High Humidity Problems
High humidity is a common issue during cannabis curing, especially if you live in a naturally humid environment. If the humidity levels in your curing jars are consistently above 65%, you need to take immediate action to prevent mold.
First, try increasing the frequency of burping the jars to release excess moisture. If that doesn’t bring the humidity down, consider moving your curing jars to a different location with better air circulation or lower ambient humidity. Using a dehumidifier in the room where your jars are stored can also help reduce humidity levels.
In extreme cases, you might need to re-dry your cannabis briefly to remove excess moisture before resuming the curing process. This involves spreading the buds out in a controlled environment with low humidity for a few hours, then returning them to the curing jars once the humidity stabilizes. Be careful not to over-dry the buds during this step, as this can lead to loss of potency and flavor.
What to Do If Your Cannabis Dries Out Too Quickly
If your cannabis dries out too quickly during curing, it can result in a loss of flavor and potency. This issue often occurs in environments where the ambient humidity is too low.
To reintroduce moisture into the curing environment, add a humidity pack to the jar. These packs are designed to restore and maintain the ideal humidity levels, helping to rehydrate your buds without overdoing it. Additionally, consider moving your curing jars to a slightly more humid location if possible.
Another method to rehydrate over-dried cannabis is to place a small piece of citrus peel, a damp (but not wet) paper towel, or a fresh cannabis leaf in the jar for a few hours. Be sure to monitor this process closely, as leaving these items in the jar for too long can lead to mold growth. Once the desired moisture level is restored, remove the rehydrating agent and continue curing as usual.
Preventing Humidity Fluctuations in Your Curing Space
Humidity fluctuations can be detrimental to the curing process, causing inconsistent results and potentially leading to mold or over-drying. Knowing how to lower humidity in curing jars ensures stable conditions and better results. To prevent these fluctuations, keep your curing space as stable as possible in terms of temperature and humidity.
Avoid opening the jars too frequently or leaving them open for too long during burping. Ensure that your curing space is not exposed to direct sunlight or heat sources, as these can cause sudden changes in temperature and humidity. Using a hygrometer to continuously monitor the environment will help you spot any fluctuations early and take corrective action.
For growers dealing with extreme climates, consider creating a dedicated curing room or cabinet where temperature and humidity can be precisely controlled. Insulating this space from external weather conditions can help maintain a more consistent environment, reducing the risk of sudden fluctuations that could disrupt the curing process.
Long-Term Storage and Humidity Maintenance for Cured Cannabis
Once your cannabis is properly cured, the next step is to store it in a way that maintains its quality over the long term. Proper storage techniques, including humidity control, are essential for preserving the potency, flavor, and freshness of your cannabis.
Best Practices for Storing Cured Cannabis
To store your cured cannabis, use airtight glass jars or containers that protect the buds from light, air, and moisture. Store the jars in a cool, dark place, ideally at a temperature of around 60-70°F (15-21°C).
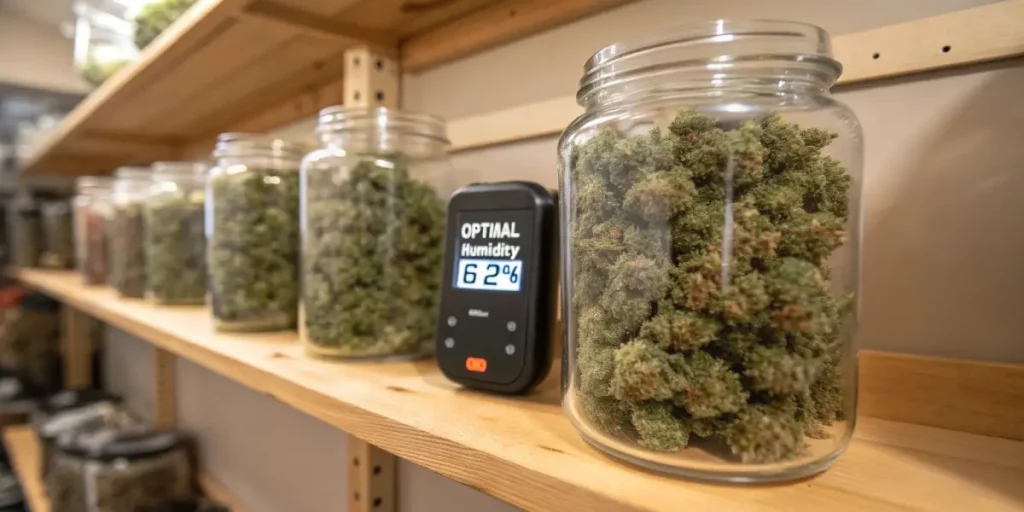
Maintaining the correct humidity level during storage is just as important as during curing. Aim for a relative humidity of 55-62% to keep the buds from drying out or becoming too moist. Using humidity packs designed for long-term storage can help keep the environment stable inside the jars.
For those planning to store cannabis for extended periods, consider vacuum-sealing the jars or using nitrogen-filled containers. These methods reduce oxygen exposure, which can degrade cannabinoids and terpenes over time. While these techniques require specialized equipment, they can significantly extend the shelf life of your cannabis, ensuring it remains fresh and potent for months or even years.
How to Maintain Ideal Humidity in Long-Term Storage
Maintaining the ideal humidity level in long-term storage is crucial for keeping your cannabis fresh and potent. Over time, improperly stored cannabis can lose its potency and flavor as the cannabinoids and terpenes degrade.
Regularly check the humidity levels inside your storage jars using a hygrometer. If you notice the humidity dropping too low, add a humidity pack to bring it back to the desired range. Similarly, if the humidity rises, burp the jars briefly to release excess moisture. By keeping the environment stable, you can extend the shelf life of your cannabis and enjoy it at its best.
Consider rotating the jars occasionally during long-term storage to ensure even air distribution and prevent any localized moisture build-up. This simple step can help maintain the overall quality of your cannabis, preserving its flavor, aroma, and potency over time.
Avoiding Storage Issues that Affect Cannabis Quality
Even after careful curing, improper storage can undo all your hard work. Common issues such as exposure to light, air, or fluctuating temperatures can degrade the quality of your cannabis.
To avoid these problems, always store your cannabis in a dark, cool place and avoid opening the jars unnecessarily. Keep the jars sealed tightly to prevent air from entering and affecting the humidity levels. By following these best practices, you can preserve the quality of your cannabis for months or even years.
For added protection, consider using UV-blocking glass jars that prevent light exposure while allowing you to see the contents. This additional layer of protection can help maintain the potency and freshness of your cannabis, ensuring that it remains in top condition until you’re ready to enjoy it.
FAQs
What is the ideal humidity level for curing cannabis?
The ideal humidity level for curing cannabis typically ranges between 55% and 65%, depending on the strain. Indica strains may benefit from the higher end (60–65%) to preserve density, while sativa strains do better around 55–60% to avoid moisture retention that can lead to mold.
How can I lower humidity in cannabis curing jars?
To lower humidity in curing jars, you can burp the jars daily by opening them for a few minutes to release excess moisture. If that’s not enough, use a dehumidifier in the storage room or add humidity control packs to maintain stable levels between 55–62%.
What happens if cannabis dries too quickly during curing?
If cannabis dries too fast, it can lose essential terpenes and cannabinoids, resulting in a harsh smoke and reduced potency. To fix this, add a humidity pack to reintroduce moisture gradually and restore the curing balance without risking mold.

