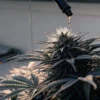
Autoflowering Feeding Schedule: Guide for Cannabis Growers

Autoflowering cannabis strains have carved a special niche in the hearts of cannabis enthusiasts and cultivators. With their ability to thrive under a variety of conditions, fast growth cycles, and automatic flowering regardless of light exposure, these plants are perfect for both beginners and seasoned growers. However, to truly unlock their potential, understanding and implementing the right autoflower feeding schedule is key. In this guide, we will take an in-depth look at how to nourish your autoflowers at every stage of their life cycle, ensuring healthy growth and bountiful yields.
What Sets Autoflowers Apart?
Autoflowering cannabis strains are unique compared to their photoperiod counterparts. Their defining characteristic is their ability to transition into the flowering stage automatically after a set period, rather than being dependent on changes in light cycles. This is thanks to their genetic makeup, which includes traits from Cannabis ruderalis, a variety that evolved in harsh environments with limited daylight.
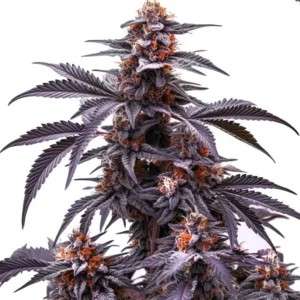
Recommended Strains

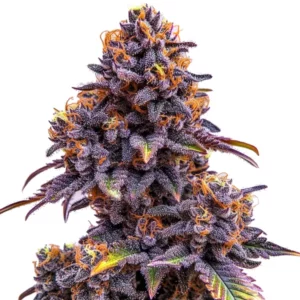
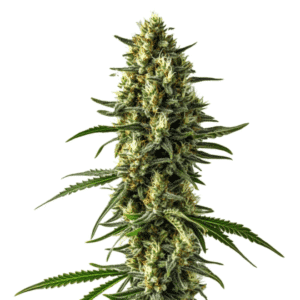
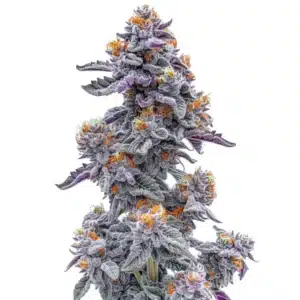
Maracuya Auto
|
|
THC | 20% - 22% (Medium) |
|
|
Type | Autoflowering |
|
|
Yield | High |
|
|
Phenotype | 50% Indica / 50% Sativa |

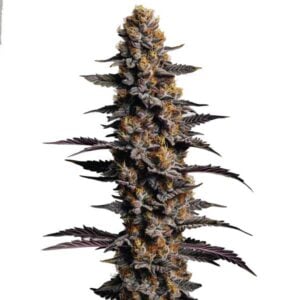
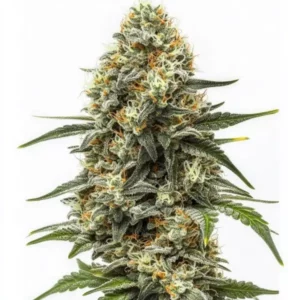
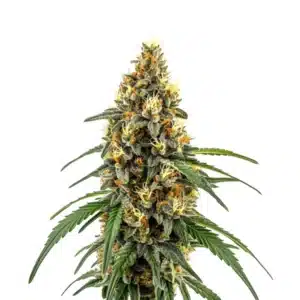
Maracuya Regular
|
|
THC | 15% - 20% (Medium) |
|
|
Type | Regular |
|
|
Yield | High |
|
|
Phenotype | 40% Indica / 60% Sativa |
This natural resilience makes autoflowers an attractive option for growers, but their differences also mean they require a specialized approach to feeding. Their life cycle is short, typically lasting 8-12 weeks, leaving little room for mistakes. This is why a well-thought-out autoflowering feeding schedule can make all the difference in achieving a successful grow.
Why Tailored Feeding Is Essential for Autoflowers
There are several reasons why autoflowers benefit from a specific nutrient regimen:
- Rapid Growth: Autoflowers grow quickly, completing their entire cycle in a fraction of the time it takes photoperiod plants. This accelerated pace means their nutrient needs change rapidly, requiring growers to stay ahead of the curve.
- Compact Size: These plants are often smaller than photoperiod strains, which means overfeeding can easily overwhelm their delicate systems.
- Sensitive Roots: Autoflowers tend to have smaller root systems, making them more susceptible to nutrient imbalances and requiring precise care.
By acknowledging these unique traits, you can create a feeding schedule that supports your plants’ health and maximizes their potential.
Promos & Deals

A Deep Dive Into the Autoflowering Feeding Schedule
Autoflowering Feeding Schedule Week 1: Laying the Foundation in the Seedling Stage
The first week of your autoflower’s life is all about establishing a strong foundation. At this stage, the plant is highly delicate and requires minimal nutrients. Overloading it with fertilizers can do more harm than good.
During this critical phase, your focus should be on hydration and root development. A nutrient solution with a very mild concentration such as an NPK ratio of 1-1-1 or 2-1-1 can be introduced sparingly. Remember to keep the pH of your water between 5.5 and 6.0 to facilitate nutrient absorption. Overwatering is a common pitfall during this stage, so make sure the soil remains slightly moist but not soggy.
Autoflowering Feeding Schedule Weeks 2-3: The Early Vegetative Stage
Once your plant transitions into the vegetative stage, its growth will become more vigorous. You’ll notice the development of new leaves and stems, signaling the need for increased nitrogen intake to fuel this growth.
During this period, a balanced nutrient mix with an NPK ratio of 3-1-2 is ideal. Nitrogen supports leaf and stem development, while smaller amounts of phosphorus and potassium contribute to overall plant health. It’s also a good time to introduce calcium and magnesium supplements to prevent deficiencies that can stunt growth. Start with a low dosage around 25-50% of the recommended amount and monitor your plant’s response closely.
In addition to feeding, maintain consistent watering practices. Let the soil dry out slightly between waterings to encourage healthy root expansion. This is also when you should start training your plant gently if you plan to use techniques like Low Stress Training (LST).

Autoflowering Feeding Schedule Weeks 4-5: Transitioning Through the Late Vegetative Stage
As your autoflower matures, its nutrient needs will shift slightly. During the late vegetative stage, the plant begins to prepare for flowering. While nitrogen is still important, you’ll need to start increasing phosphorus and potassium levels to support the upcoming bloom phase.
An NPK ratio of 2-1-2 works well during this stage. Additionally, incorporating trace elements like zinc, manganese, and iron can enhance your plant’s overall vitality. Pay close attention to your plant’s leaves during this time; yellowing or discoloration can indicate a nutrient deficiency or pH imbalance.
Maintaining proper pH levels is crucial aim for a range between 5.8 and 6.2. If you notice any signs of nutrient lockout, flushing the soil with pH-balanced water can help reset the medium and restore balance.
Supporting the Flowering Stage With Nutrients
Autoflowering Feeding Schedule Weeks 6-8: Early Flowering
When your autoflower starts producing buds, its focus shifts from vegetative growth to flower development. During this stage, phosphorus and potassium become the most critical nutrients. These elements support strong bud formation and enhance the production of cannabinoids and terpenes.
Switch to a bloom formula with an NPK ratio of 1-2-2. To further boost flower development, consider adding bloom boosters or flowering enhancers. These supplements often contain additional phosphorus and potassium, as well as other micronutrients to maximize resin and terpene production.
It’s essential to reduce nitrogen levels during this stage, as excess nitrogen can lead to leafy buds and inhibit proper flowering. Keep monitoring your plant for any signs of nutrient deficiencies or excesses, such as burned leaf tips or yellowing leaves.

Autoflowering Feeding Schedule Weeks 9-10: Peak Flowering
By now, your plant’s energy is entirely directed towards developing dense, resinous buds. Nutrient requirements will lean heavily toward phosphorus and potassium, while nitrogen should be kept to a minimum.
A late bloom formula with an NPK ratio of 0-2-3 or 0-1-3 is ideal. During the final week, it’s recommended to flush your plants with plain, pH-balanced water to remove any residual nutrients from the soil. This process enhances the flavor and quality of the final product by eliminating chemical buildup.
Navigating Common Challenges
Avoiding Overfeeding
One of the most frequent mistakes in cultivating autoflowers is overfeeding. These plants have a smaller stature and shorter life cycle, which means they require fewer nutrients overall. Always start with a low dosage and increase gradually based on your plant’s response. Signs of overfeeding include dark green leaves, burned tips, and nutrient lockout.
Monitoring pH Levels
Maintaining the correct pH range is crucial for nutrient uptake. For soil grows, aim for a pH of 6.0-6.5. For hydroponic systems, a range of 5.5-6.0 is optimal. Invest in a reliable pH meter and test your water and nutrient solution regularly.
Choosing the Right Nutrients
Not all nutrient formulas are created equal. Many products are designed for photoperiod plants and may not be suitable for autoflowers. Look for nutrient lines specifically formulated for autoflowering strains or use organic amendments for a more natural approach.

Organic vs. Synthetic Nutrients: Finding the Right Balance
Growers often debate the merits of organic versus synthetic nutrients, especially when feeding autoflowers. Both have their advantages, and the choice ultimately depends on your growing style and goals.
Why Go Organic?
Organic nutrients, derived from natural sources, are ideal for growers who prioritize flavor and environmental sustainability. They enrich the soil with beneficial microbes and improve its structure over time. Organic methods also tend to produce cannabis with richer, more complex terpene profiles.
The Case for Synthetic Nutrients
Synthetic nutrients offer precision and control, making them a favorite among growers aiming for maximum yields. These formulas are highly concentrated and fast-acting, ensuring that plants receive the exact nutrients they need at each stage of growth. However, they may require more careful monitoring to avoid nutrient buildup and pH fluctuations.
Many growers find success by combining the two approaches, using organic amendments as a base and supplementing with synthetic nutrients as needed.
Pro Tips for Success
- Observe and Adapt: Every plant is unique, so pay attention to its signals. Adjust your feeding schedule based on its appearance and growth patterns.
- Document Your Process: Keep a grow diary to track what works and what doesn’t. This will help you refine your autoflowering feeding schedule over time.
- Stay Consistent: Autoflowers thrive on stability. Regular feeding, watering, and environmental conditions are key to their success.
Frequently Asked Questions
Can All Autoflowers Use the Same Feeding Schedule?
While the principles remain the same, individual strains may have unique nutrient requirements. Research your specific strain to tailor your feeding schedule accordingly.
How Often Should I Feed Autoflowers?
A common practice is to feed every other watering. This helps prevent nutrient buildup in the soil, which can lead to lockout or toxicity.
Do Autoflowers Require Less Nutrients Than Photoperiod Plants?
Yes, due to their smaller size and faster life cycle, autoflowers generally need fewer nutrients. Start with lower doses and increase gradually.