Growing indoors can become a kind of cool but tricky science experiment. Many growers don’t have the resources, time, or space for an indoor grow. Because of this, the option of growing cannabis outdoors becomes more attractive. Lighting and ventilation is free as it is given to us by nature and the process is quite simple. In addition, it can result in better performance than growing indoors thanks to the ample space to grow and the strength of the sunlight.
However, you must pay attention because when growing cannabis outdoors, certain factors must be taken into account such as the hours of light, the temperatures, the type of weather, and also the humidity levels, among others variables that allow for cultivating weed in an optimal way. For this reason, in this guide, we are going to teach you from the most basic to more specific points how to grow marijuana outdoors so that you can enjoy great harvests with beautiful buds.
When do you start growing cannabis outdoors?
In theory, we should start an outdoor marijuana crop between March and May in the spring months which is when the days start to get longer and the daylight hours get longer. Here, we detail everything much better to help you know when to plant marijuana. We know that in the growth period, the plants need 18 hours of light for their development. That’s why we must start the cultivation between those dates. The plants will flower from June 24 which is when the days start to get shorter and we need about 12 hours for flowering.
Now, depending on the area in which we live or are going to grow, we will have to start sooner or later. If the area is cold, we are not going to plant outdoor marijuana in March because there will still be some snowfall. In this case, it is better that we wait until the end of April or May. If the area is warm like in the south, we can start in March and harvest our buds before. If we grow indoor marijuana, we can start whenever we want.
Some geographical details should also be taken into account before starting to cultivate. By this, we mean that In addition to weather patterns, you also need to understand how the length of the day changes seasonally. For example, at 32°N latitude (San Diego), you will experience just over 14 hours of daylight at the summer solstice (the longest day of the year), while at 47°N latitude (Seattle), you will have about 16 hours of daylight in the same day.
If you want to have an optimal crop outdoors, you should know what geographical area you are in. For example, Southwest growers can grow outdoors without problems because the days in the growing season tend to be very hot with high temperatures and the environment is dry with low humidity. Unlike gardeners who live in midwest USA who must be careful with the mold that can damage their crops during flowering. Although the climate is a bit variable, they can raise their weed plants outdoors and directly in the ground or in giant pots filled with substrate.
The northeast United States has sunny days that are very good for growing outdoors because the high temperatures are compensated by the ambient humidity which allows you to grow cannabis plants in pots or directly in mother soil outdoors. For northeast and southeast USA, we do not recommend growing outdoors because the climate and geographical location of this territory do not contribute to the plants growing and flowering in a good way. The excess humidity and the intense continuous rains in these areas make outdoor cultivation more complex and even frustrating. Therefore, it is always advisable to grow indoors.
Hours of light for growing outdoors
Daylight hours are essential for the development of the plant from its growth to harvest, including flowering. Thus, we can say that for the southern hemisphere, including countries like Chile, Argentina, or Uruguay, the growing season starts in September and ends between April and May, depending on the variety that we are growing. In these areas, the hours of light extend up to 16 due to the geographical location of these countries, especially in the spring and summer seasons.

In countries that are on the equator such as Colombia, Ecuador, or even Brazil (north), the hours of constant light are 12 hours. In these countries and those of Central America, it is normal for native genetics to be of the sativa type and adapted to outdoor cultivation with only 12 hours of light. However, it is the modern genetics like the ones we sell at Blimburn Seeds that need extra help with lighting systems that complement the daylight hours outdoors or in the greenhouse up to 18 hours. For example, we can say that in Colombia, many outdoor or greenhouse growers complement the hours of light with lighting systems, using low-energy lights to promote optimal growth of weed plants.
Now, in the northern countries, the daylight hours are usually longer in the summer season, especially in countries like Canada or the USA. Therefore, this season is the perfect time to grow outdoors. To this, we add that in the summer, the temperatures rise, the days are warmer, and the rains decrease. This is the big difference with the countries in the equator area because the temperatures are high and remain stable and the humidity is also very high.
Ambient temperature in the growing area
As we pointed out in the previous paragraph, temperatures are also important and that is why we grow outdoors during the summer during the best temperatures. At this point, it is also good to mention that one of the factors most neglected by growers is the temperature of the roots which is fundamental. When plants grow in pots on terraces, it is very common for the floor tiles to reach very high temperatures in full sun. If the pots are not isolated from the ground, the soil overheats and the roots suffer a lot which prevents them from absorbing water and nutrients normally.
Let’s not forget that the roots of plants growing in the ground rarely experience temperatures above 30ºC, while in a pot in the sun, they can reach 50ºC. The easiest way to avoid this overheating is to place the pots on an insulated surface such as a cork board or a wooden pallet. You can also put the pots inside another larger pot (and if possible a white one so that it reflects as much light as possible and does not get so hot). The layer of air that remains between the two pots insulates the substrate from the outside heat and keeps it cooler.

Otherwise, if the floor temperatures for growing in direct soil or outdoors are very low, we do not recommend doing it. This is because the roots of the plants tend to be blocked just like with high temperatures and that means that your plants are not going to grow and develop optimally because they are not going to absorb the nutrients that they need. This, in the end, will cause all of the effort you have made to cultivate to be useless and disappoint you. We always prefer the best temperatures possible for growing weed outdoors.
The space in the crop
It is very important to place the plants in an area that receives as many hours of direct sunlight as possible and never less than five or six. Also, avoid putting them near trees or walls that cast shadows on them. The same goes for the other plants – they must be placed far enough apart from each other so that the sun illuminates them completely, both in the upper and lower parts. With good lighting, the plants develop in all directions and create buds everywhere. On the other hand, if they are planted very close together, only the highest branches will receive intense sun and the lower branches will not have enough energy to produce good buds.
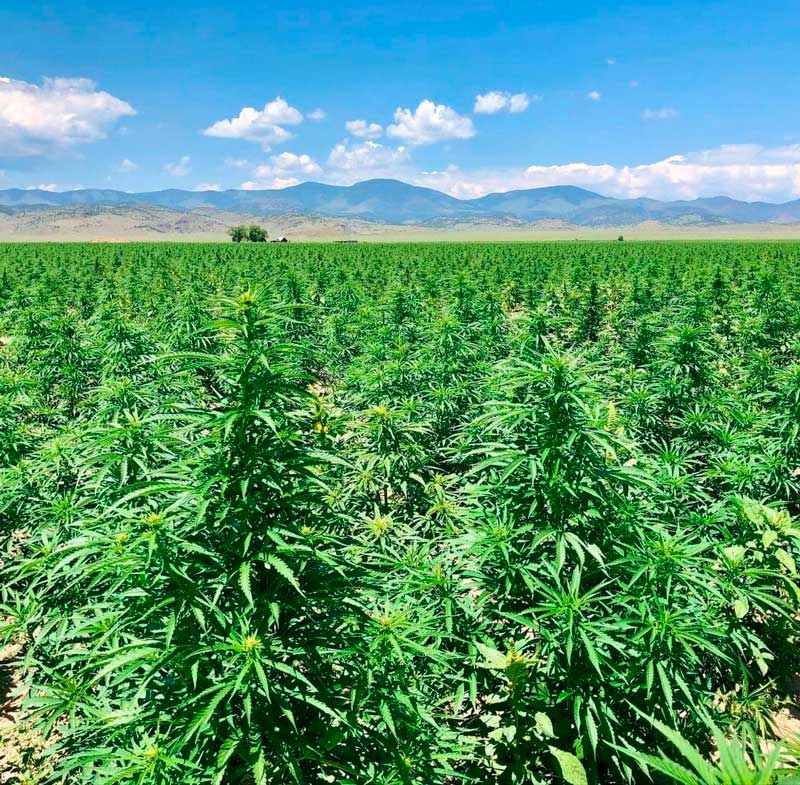
A plant that lives surrounded by other nearby plants will grow in height at great speed in search of light, fleeing from the shadows. However, it will do so with large internodes and poor development of lateral branches. In the end, it will be a lanky and not very productive plant whose branches will bend easily due to the weight of the buds and not because they are very thick and dense but because of the lack of strength of the branches. Plants should never be placed too close to each other, even when growing. If we find ourselves in a situation where the plants are planted too closely together, it is advisable to prune the poorly lit lower branches so that the plants concentrate on the upper buds. Pruning also facilitates the passage of air through the lower areas which reduces the risk of fungi and other pests.
Growing outdoors in pots

If we grow outdoors in the northern hemisphere or in Europe, we will notice that in July, plants that live in pots need very frequent watering because the plants consume a lot of water in such high temperatures to stay cool. Growth is very rapid and subscribers should increase to no less than two or three per week to achieve good performance. The soil in the pots should be washed with plenty of water at least once every two or three weeks, watering them copiously with about three liters of water per liter of soil. The water drains through the soil and out through the holes in the pot, dragging excess salts with it. Regular washing keeps the soil in good condition for growth and prevents imbalances and nutritional deficiencies from occurring.
Growing outdoors in mother earth
Marijuana that grows in the ground grows on its own if it doesn’t lack water and the bugs don’t eat it, of course. The key is to monitor the plants and prevent problems. By spraying the plants alternately with neem oil, horticultural soap, and Bacillus thuringiensis, we protect them against insects, fungi, and caterpillars, respectively, the three great dangers facing a cannabis plant.

Of each liter of irrigation water, a good part is lost through evaporation, especially due to the overheating that the earth suffers due to the sun. The best way to reduce evaporation is to cover the soil with plastic, straw, newspaper, compost, or any other material that provides shade and avoids direct sun. If plastic or other waterproof material is used, it will have to be lifted every time you want to water it.
It is better to water in the afternoon so that the plants can absorb water throughout the night and arrive in the morning well hydrated. In any case, the important thing is that they never lack water because if they wither, they stop growing and may take a day or two to resume, depending on how severe the dehydration has been.
Guerrilla Crops
Most guerrilla crops do not have as much water available to wash the soil, so it is very important not to abuse the fertilizer because if it accumulates in excess, it would be almost impossible to eliminate it. On the other hand, unless water is not a problem, it is usually better not to fertilize guerrilla plants too much because if they get too big during the growing season, they would then need so much more water during flowering than they would have access to. Also, if water is slightly rationed during growth then they do not need as much and they flower better.
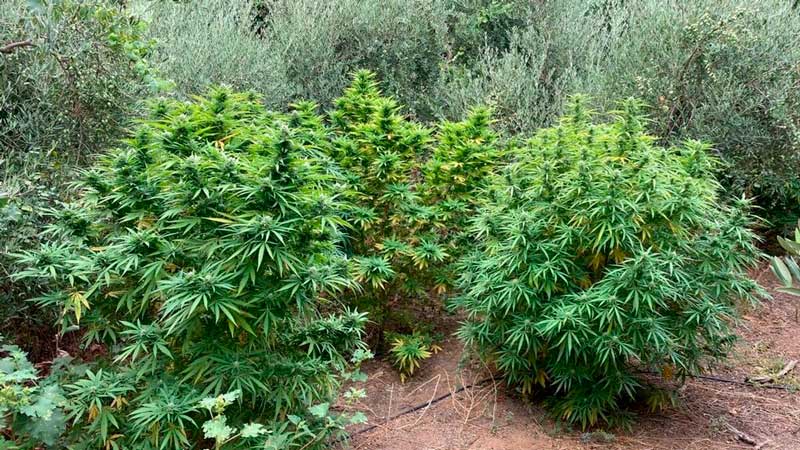
July and August are undoubtedly the busiest months for the guerrilla cannabis grower. As beautiful as the plants are in June, if they don’t have enough water in July and August, the harvest will be poor. A large plant will need a minimum of twenty or thirty liters a week, although the figure can be much higher if the temperature is extreme and the plant is really large or somewhat lower if it rains or the weather is cool.
Now, we continue with our outdoor cultivation guide to help you have the best harvests. In the first part of our guide, you were able to see topics such as the type of outdoor cultivation, the best growing season, and the hours of light that plants require, among other topics. In this sequel to the guide on how to grow marijuana outdoors, we are going to review concepts such as apical pruning, stress training, the fertilization of cannabis plants, and irrigation, among other ideas and topics that are fundamental for an optimal cultivation.
The importance of the soil
Cannabis plants need well-drained, slightly acidic soil that is rich in organic matter in order to thrive. If you decide to plant directly in the ground, you will need to understand the composition of your soil and modify it accordingly. Heavy clay soils drain slowly and do not hold oxygen well, so they will need to be heavily amended. At least a month before planting, you have to dig large holes to place the cannabis plants in and mix in large amounts of organic compost, manure, worms, or other decomposed organic matter. This will provide aeration and drainage as well as nutrients for the plants. In any case, do not overdo it either as an overdose can be counterproductive for the crop.
Sandy soil is easy to work with, drains very well, and heats up quickly, but it does not retain nutrients well, especially in rainy environments. Once again, you will need to dig large holes for the plants and add compost, peat moss, and coir which will help bind the soil together, providing air circulation and food. In hot climates, sandy soil should be mulched to help retain water and keep the roots from getting too hot.
Loamy soil is the ideal growing medium. It is easy to work with, heats up quickly, and holds moisture while also having good drainage and containing many nutrients. The best silty loam is found in prehistoric river beds and lakes. This dark, crumbly soil is the most fertile and will likely need little to no modification. If you really want to ensure good results and minimize complications and problems in cultivation, it is easy and relatively inexpensive to carry out soil tests. A soil testing service will tell you the composition and pH of your soil, notify you of any contaminants, and also recommend how to amend the soil and what materials and fertilizers to add.
Fertilizer for the life
Cannabis plants require a large amount of food throughout their life cycle, primarily in the form of nitrogen, phosphorous, and potassium. How you choose to feed them will depend on your methods and soil composition. Commercial fertilizers intended for home gardeners can be used if you have a good understanding of how they work and what your plants need, but should generally be avoided by less experienced growers. You can buy nutrient solutions designed specifically for cannabis at your local grow shop, but they are often expensive and can harm soil bacteria as they are usually made up of synthetic mineral salts and are intended for indoor, soilless cultivation.
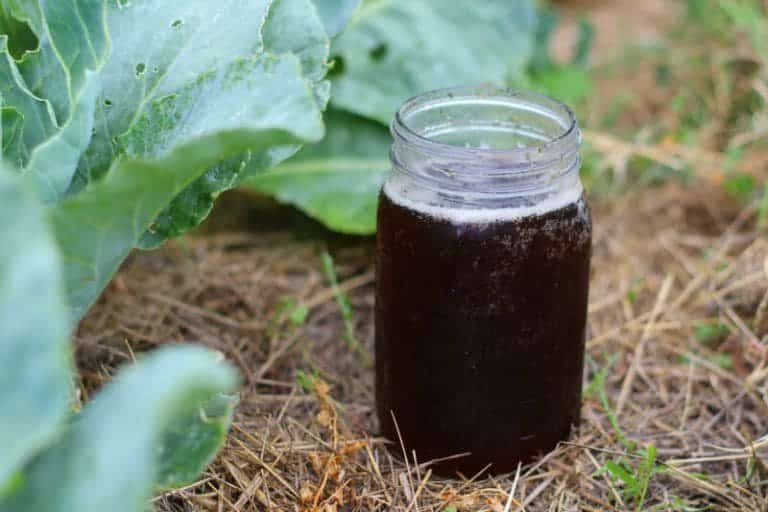
Liquid fertilizer of worm humus
Many expert outdoor growers turn to organic fertilization methods because they maximize the microbial life in the soil and minimize damaging runoff. There are many different natural and organic fertilizers available and other products sold in garden stores such as blood meal, bone meal, fish meal, bat guano, and algae meal. Learning about what they are and how they work will be extremely helpful.
If you use fertilizers purchased at the local grow store, we recommend following the manufacturer’s instructions which are usually on product labels or on their website or social media. In case you can’t find the information, the best thing you can do is ask at the store for advice in order to make sure you get a good performance from the fertilizers and don’t throw your money away.
Good irrigation is important
While outdoor cannabis grows have the benefits of rain and groundwater not found indoors, you will most likely need to water your plants frequently, especially in the hotter summer months. Large cannabis plants can consume up to 40 liters of water each day in hot climates. Growers who live in hot, arid places often dig and place loamy soil or rocks under their planting to slow drainage or plant in shallow depressions that act like a funnel, directing water from the surrounding area into the plants. The addition of water-absorbing polymer crystals to the soil is another good way to improve water retention, especially in guerrilla crops, that is, remote crops where we cannot water every day.
If you live in a particularly rainy climate, you may need to take steps to improve drainage around your garden as cannabis roots are highly susceptible to fungal diseases when in waterlogged conditions. To avoid the problems outlined above, you can grow your marijuana with the following techniques: planting on raised mounds, digging ditches that direct water away from the garden, or adding gravel, clay pebbles, and perlite to the soil.
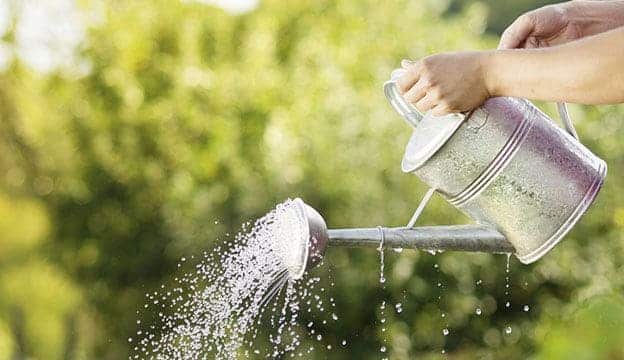
Container or potted gardens dry out much faster than those planted in the ground and often need to be watered every day or at least much more frequently. Plants that grow in hot conditions and strong gusts of wind will also need to be watered more frequently. High temperatures and winds force the plant to transpire at a higher rate. Remember that overwatering is the most common mistake novice growers make. The general rule of thumb is to water deeply, then wait until the top of the soil is completely dry before watering again. An inexpensive soil moisture meter is a good tool to keep the beginner out of trouble. Keep in mind that excess moisture rots the root system, blocks the absorption and assimilation of nutrients by the plant, and the latter results in its death, so you have to be very careful.
Cannabis-friendly fungicides and antifungals
Protecting your cannabis garden from pests can be a difficult and complex challenge. Animal pests such as deer, wild boar, or rabbits are easily dealt with: fences and cages will keep them at bay. When it comes to the wide variety of crawling and flying insects that can attack your plants, things get a little more complicated. The best protection is simply to keep the plants healthy. The more vigorous cannabis plants have a natural resistance to pests that makes minor pest attacks easy to deal with. It is also a good idea to keep cannabis plants separate from other types of plants, including vegetables or ornamentals as pests can easily spread from one to another.
Examine your cannabis plants daily for signs of pests. An infestation is much easier to treat if it is caught early. Washing plants with a mild solution of potassium soap and water can stop a minor infection. In case this doesn’t work, there are many organic insecticides designed for cannabis, often derived from Neem tree oil or other natural botanical extracts. These are quite effective when used correctly. In case the plague is very advanced, the best option is chemical insecticides as they are very aggressive but effective.
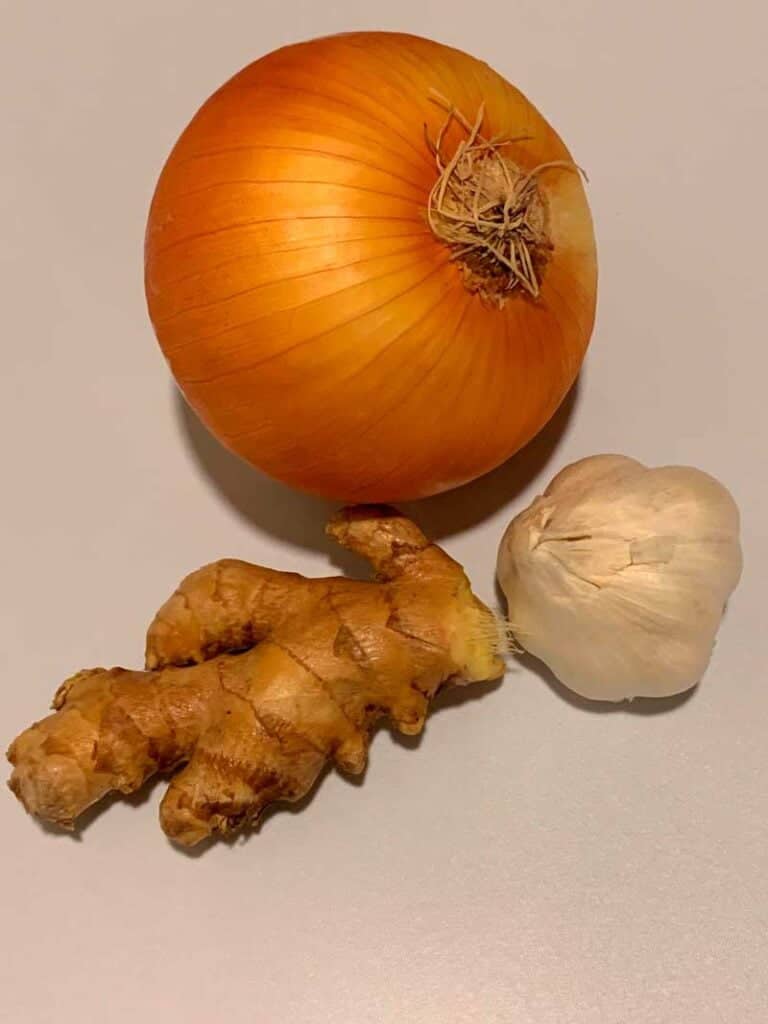
It is good to note that many gardeners prefer to make organic fungicides to combat pests and use materials such as vegetables like onions which have properties that repel insects and pests. To use the onion as a fungicide, you must use the whole onion, leaves included, and 500 grams per liter of water. It is then diluted 10 times and applied in the first or last hour of daylight.
In addition, nettle is used to combat the mildew fungus. To use nettle, you must follow the following preparation: Let 2 kilos of fresh nettle or 400 grams of dry nettle macerate in 20 liters of water for 5 days and then strain the preparation. Before spraying it on the affected plants, you must dilute this extract in twice the amount of water.
Believe it or not, cinnamon seems to be one of the most effective elements to definitively eliminate powdery mildew (a white fungus that spreads like powder) from marijuana, even in cases that we would consider lost. When you want to use canale, you should spray the plants every 72 hours for a few days until the fungus is exterminated. Then, the frequency can be lowered to once every two weeks for preventive purposes.
Pruning and cleaning plants
Cleaning of the low branches increases ventilation and eliminates shaded areas. Pruning of the main stem stimulates branching and changes the structure of the plant. Also, an apical-type pruning can be done which is a process that consists of cutting the main point (the central stem) because this is the area that grows the most on the plant because it is where the auxins accumulate which are the hormones that stimulate growth. When it is cut, the auxins are distributed to the tips of the branches that follow it in height (middle and lower branches) and its growth is accelerated. Cutting off the central tip is the quickest and easiest way to create a plant that is bushy (with lots of equal-sized buds) rather than fir-shaped (with a larger main bud surrounded by smaller secondary buds).
A couple of weeks after the pruning of the main tip, the tips of the new dominant branches can be cut to further increase branching and enhance the bushy form, achieving a greater number of tips. This technique is used a lot indoors but is also useful outdoors, especially when we want to create a large but not too tall of a plant. It works best with very large pots (especially if they are wide) or when the cannabis plants are grown directly in mother soil.
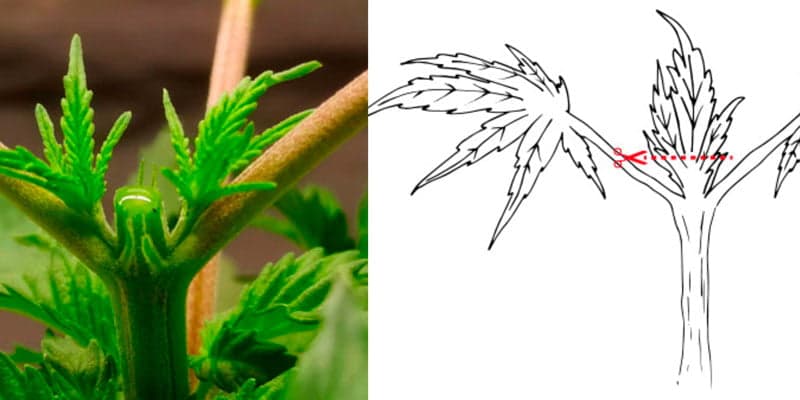
Apical pruning type Fim pruning Type
Another type of pruning is the famous FIM pruning which also provides greater production through a relatively simple technique and within the reach of all cannabiculturists. To do this pruning, we must select the shoot or shoots to use and with fine and sterilized scissors, we proceed to cut just the two leaves that form the new shoot. It is much more difficult to see and do than the apical pruning but very similar. To help see the part to cut, we have a photo in which we can see exactly what part to cut from the new shoot.
This FIM pruning can be applied during growth as many times as you want. This way, you increase shoots and consequently, the productive performance of the plant. It only remains to say that these types of pruning delay the growth of the plant which has its benefactors, although there are people who do not like them. Also, not all varieties of marijuana plants accept this type of action well. Luckily, here at Blimburn, we have the right seeds to provide you with resistant and powerful plants that can withstand all kinds of pruning.
Support your cannabis plant
When you cultivate correctly from the rooting of the plants through their growth and you carry out the respective pruning and cleaning that we recommend in this article, you will surely obtain a monster plant. It is for this reason that it is important to help the weed plants, strengthening the stem and structure of the specimens that we raise in the garden. To achieve good support, the structure must be reinforced with the help of tools such as circular supports which are ideal for outdoors because they protect the entire plant by surrounding it and supporting all of its branches. With this, strong gusts of wind will not make a dent in the stems and branches. When we reach flowering, we won’t have to suffer thinking that the heavy buds are going to touch the ground.

Also, we have the help of fertilizers to strengthen the structure, starting at the beginning of the crop with root stimulators. With a good root system, we will give the plants the opportunity to absorb all of the nutrients and grow strong. Next, we enlist the help of growth stimulators to create a thick, branchy structure. To this, we must add the trichodermas, fungi that protect plants from growth to the end of their cycle. There are also different products that you can get in the grow shop such as vitamins and stimulants that lower the stress levels of the weed plants. All of this together helps to have more powerful and strong plants when it comes time to start flowering.
We have advanced very quickly with this step-by-step outdoor cultivation guide, sharing details that you may not have known. Now, we have to tell you that in the last part of this guide, we are going to talk in depth about the flowering of cannabis plants outdoors and we are also going to give you the best hacks so that you can get the maximum performance out of your plants. Don’t forget that at Blimburn Seeds, we have a great stock of the most popular weed strains on the market and also those that are praised by the most expert gardeners on the planet.
The flowering period of outdoor marijuana plants takes place around the months of July and August in the northern hemisphere, while in the southern hemisphere, it usually begins around the months of November and December. This phase is one of the most anticipated and exciting for cannabis growers as it is the moment when their plants begin to produce the expected buds.
Given the importance of this stage in the plant growth process, it is important to understand both the flowering phase and the so-called “pre-flowering” phase to try to get the most out of both. In outdoor cultivation, marijuana begins to flower when the days begin to get shorter and the hours of light that the plants receive decrease. This phase is a period that can vary depending on the cultivated variety and the different stimuli it receives. Before we focus on flowering, it is good to determine what is best to grow outdoors: cannabis seeds or clones? We must not forget that one of the most important processes is the selection of weed seeds for cultivation. For this reason, we are going to guide you in that process.
Clone or Seeds?
While most indoor growers grow from clones (rooted cuttings that will be genetically identical to the plant they were taken from), outdoor growers often prefer to grow from seeds. Both options have their advantages and disadvantages and we will analyze these below.
Cloning requires a “mother plant” which is a plant that is kept under 16-24 hours of light a day so that it is always growing and prevents it from blooming. The benefit of this route is that the “mother plants” have been shown to produce quality shoots that mirror the qualities of the “mother”, therefore all clones will be female plants exhibiting the same characteristics. These cuttings or clones will need to be rooted indoors and then hardened off as if it were a seedling that was started indoors.
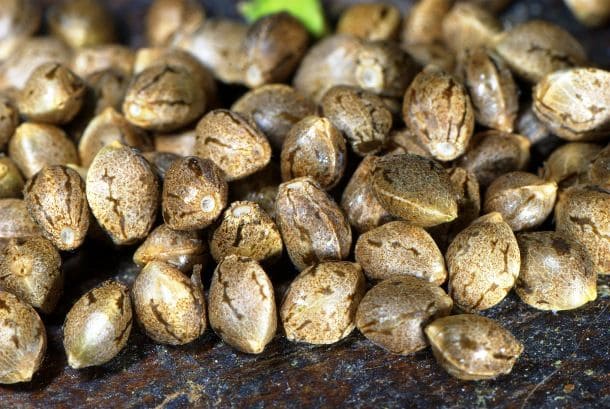
One drawback is that clones tend to be less vigorous than seeds which means the plants are smaller and produce less, although large plants can still be produced by growing clones indoors in late winter and early spring to have an advantage in the growing season. Also, cloned plants do not develop the thick taproot that penetrates deep into the soil to stabilize the plant and absorb groundwater, making them more susceptible to high winds and drought. In other words, the cuttings grow less than seed plants and have less anchorage in the ground, in addition to absorbing less water.
Plants grown from seeds are generally more vigorous than clones. Cannabis seedlings are tolerant of low temperatures and wet conditions which means you can plant seeds directly in the garden in early spring, even in cooler, wetter climates. However, if you decide to start them indoors, they will still need to harden off before transplanting. The main drawback of growing from seeds is that great care must be taken throughout the cycle, especially when they are small seedlings. Each cannabis seed is unique, but at Blimburn Seeds, we guarantee you stabilized weed seeds and female plants that have very similar and homogeneous traits in their phenotype, depending on their genetics.
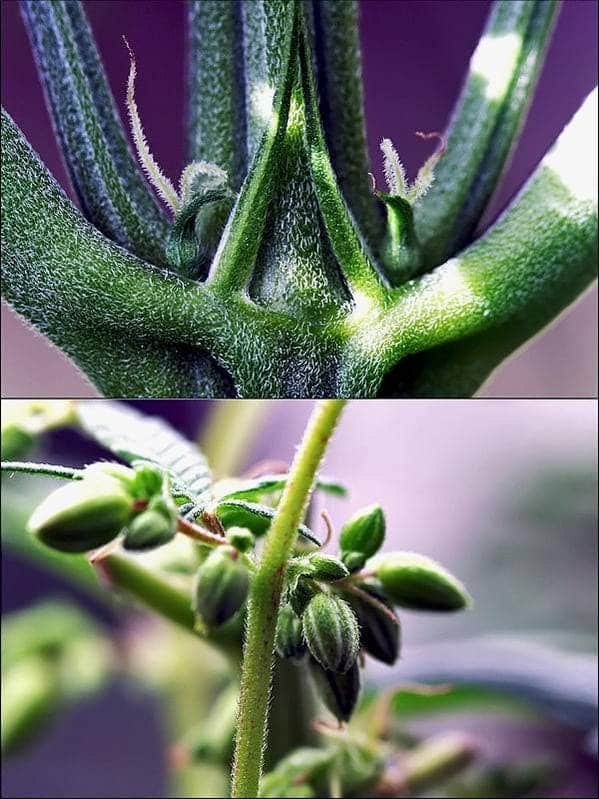
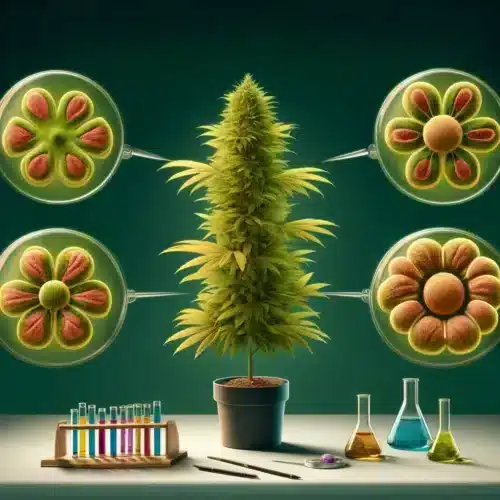
The first plant is female. The second plant is male
With regular cannabis seeds that we offer at Blimburn Seeds, you will find both males and females, so when they reach sexual maturity, you will have to eliminate any males. For this reason, many people choose feminized seeds. Another option is autoflowering seeds, a very popular alternative for outdoor growing as they begin to flower as soon as they reach maturity, regardless of photoperiod. Many gardeners in temperate climates will get two harvests each year using autoflower seeds, one planted in late winter or early spring and one planted in early summer. The drawback of these varieties is that they don’t grow as much, producing a much less abundant harvest. Although, using cultivation techniques such as SOG outdoors, you will be able to achieve maximum yields in your outdoor garden.
The 3 phases of cannabis flowering
As we said in the previous paragraphs, the flowering stage starts with the “pre-flowering” phase. However, that is not all because it also has 2 other phases. Here, we will go over all three phases so that you can obtain the maximum yield in your outdoor cultivation.
Pre-flowering stage
It really is a phase prior to the start of flowering. It is defined as the time that elapses from when the hours of light begin to decrease and the moment in which the first pre-flowers appear on the plants. In outdoor crops, this usually occurs between the sixth and eighth week of life. It is a transition phase in which each plant can triple its size in a very short time which entails a high energy expenditure. To compensate for this energy expenditure while not suffering from nutritional deficiencies, the plants will need an extra supply of nutrients, especially Nitrogen (N), Calcium (Ca), Magnesium (Mg) and other micronutrients to a lesser extent.
If you want to improve the yield, you can use specific flowering stimulators for cannabis. Not all varieties require the same amount of fertilizer, so this will largely depend on genetics as will the substrate and other environmental factors such as heat, lack of humidity, and cultivation techniques.
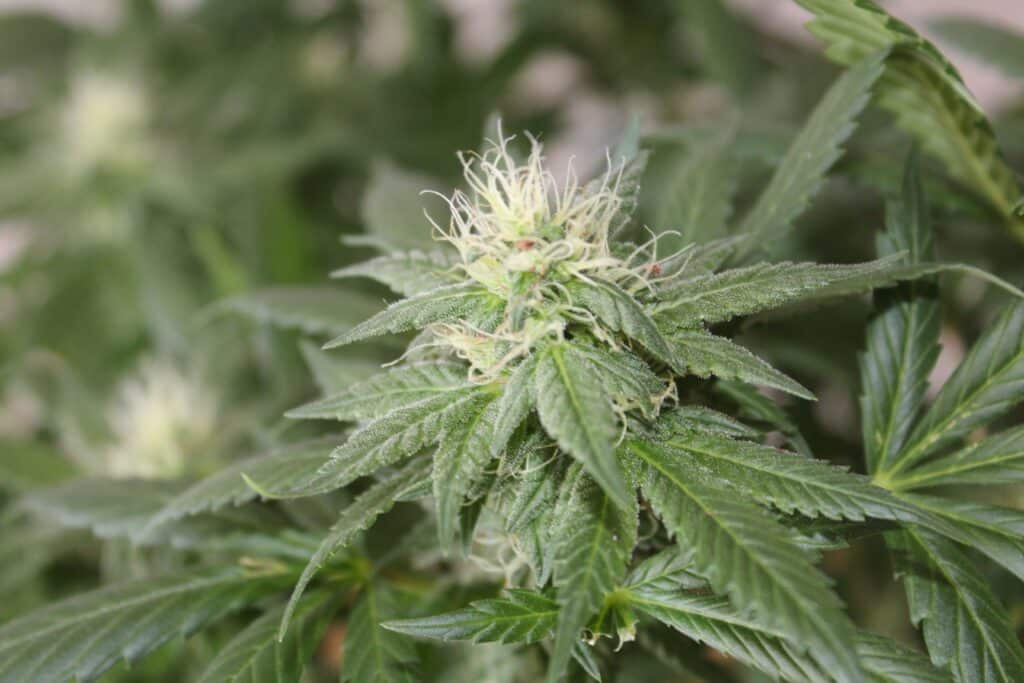
Green Crack from Blimburn Seeds passing from early flowering to flowering
The plant starts flowering
At this time, phase 2 of flowering starts which usually begins from the second to the third week of the shortening of the days. This is when the first flowers called pre-flowers begin to appear. If we grow regular seeds and we want to obtain seedless buds, it is very important to check the plants thoroughly to make sure we remove the males so that the pollination of the female plants cannot occur. With feminized seeds, we avoid this inconvenience. Remember that you can find all of these seeds in our online store at the best price.
This phase usually lasts about two weeks and takes place the 3rd and 4th week from the start of pre-flowering. During this time, the pre-flowers gradually group together at the internodes and buds to form the buds. At this time, the plants hardly grow in size, but they still need a good supply of food to produce dense and abundant buds. Phosphorus (P) and potassium (K) will now be the most important nutrients, along with some carbohydrate-based enhancer to provide extra energy.
Cannabis plant in maturation
This is the third phase which begins from the 4th and 6th week of the flowering cycle. In this phase, the plant is decreasing the formation of new flowers and focusing all of its energy on fattening the already formed buds. It is recommended to continue using a good flowering base fertilizer periodically to continue providing all of the necessary nutrients to fatten the buds as much as possible. At this stage, the formation of trichomes and terpenes also multiplies. This is what is responsible for providing the aroma, flavor, and resin.
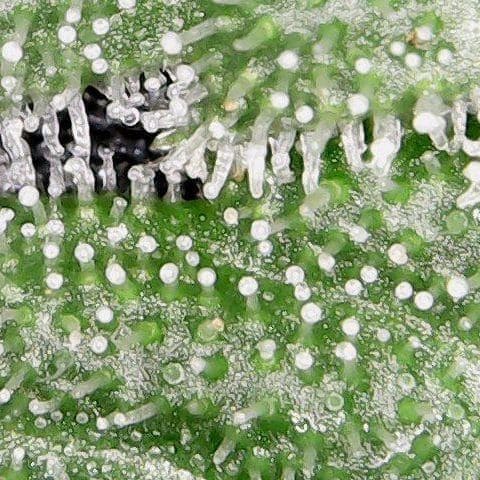
Around the 7th and 8th weeks, the buds will be well formed and the pistils will change color, going from white to brown. The terpenes and trichomes will also finish defining themselves. During this process called maturation is when the flowers have just fully formed and reach the optimal point for harvesting. It is recommended to stop fertilizing during the last two weeks before harvest to obtain tastier buds without traces of fertilizers. Instead, water only with water until it drains out of the bottom of the pot. In this way, a healthier and cleaner marijuana is achieved, ideal for use with medicinal purposes or simply for pleasure.
The best irrigation in flowering
It is very important that the substrate is well hydrated to ensure proper development of the plant. When we exceed the watering of the plant and the substrate remains waterlogged, we run the risk that the roots will rot and end up causing the plant to die. If, on the other hand, we do not provide the plant with enough hydration, its leaves will begin to fade and the roots will dry out.
When this happens, the plant finds it much more difficult to absorb the nutrients for correct development. It is ideal to water the crop 2 to 3 times a week and always be careful that the substrate is not waterlogged or dry. If you notice that the leaves of your plants are yellowish or faint, it may be due to a thirst crisis. In this case, you can place a tray under the pot. This will soak up any excess water and help rehydrate your plant, but be careful not to over-hydrate them.
A great selection of Cannabis Seeds
To avoid problems during the flowering period and in its different phases, you need to make a good selection of the cannabis seeds that you want to grow. Here, we are going to recommend some seeds, depending on the type of climate and the geographical area where you are going to cultivate your outdoor grow.
Cinderella 99 Auto
Cinderella 99 Auto is a variety that is ideal for outdoor cultivation in midwest USA because it is a fast variety that only needs 10-12 weeks in its complete cycle. Therefore, you will not have problems with the first autumn rains or with the high levels of humidity that you can feel at the end of the growing season.
This strain is mostly hybrid and originated from the crossing of Jack Herer x Cinderella99 x Magnum Auto which gives it extreme power that is between 24%-26% THC. This variety generates states of complete euphoria in users as well as delivering extra energy at the end of the flight and providing a fun and sociable relaxation.
If you grow Cinderella99 Auto in places with a climate similar to midwest USA such as in Michigan, we recommend doing it in spring on days with the highest possible temperatures and without rain. Also, remember to keep in mind that organic nutrition both in the substrate and in the fertilizers is essential for a great development of marijuana plants, even more so if we talk about autoflowering varieties.
Cake Bomb fast version
This strain is mostly indica and we recommend it for growth in western USA, especially in areas with hot and dry climates such as San Francisco. Cake Bomb Fast Version delivers fast-flowering feminized plants that produce tight, rock-hard, resin-coated buds that are ready to harvest after 8-10 weeks.
If you want to obtain maximum performance outdoors, we recommend LST in the plants to stretch their lateral arms. This is in addition to carrying out the transplant process from small pots to larger ones as well as using weed-friendly fungi such as Trichodermas for the protection of the plant and mycorrhizae to stimulate the healthy and strong growth of the roots, promoting the anchoring of the plant.
Outdoor yields of Cake Bomb Fast Version are heavy at 17-22 oz/plant, producing buds that have THC levels of 15%-19%. For this reason, we recommend using supports to help hold the weight of the buds that hang from the arms of the plants and meshes so that the plant can focus its energy on the production of its beautiful flowers.
Jack Herer x Super Skunk
This cross between two legendary strains, Jack Herer x Super Skunk, has a mostly sativa tendency and contains a power of 17%-24% THC. It generates feelings of happiness with a great spirit of sociability, stimulating you to talk. You can grow this variety outdoors in places with Mediterranean or continental climates as it supports humidity well.
Then, after 8-10 weeks of flowering, you will obtain about 24 oz/plant of buds with an intense Skunk smell and tastes of incense with notes of hashish and hints of wood. To get the best flavor out of this weed when you grow it outdoors, it is best to do it with organic fertilizers, using the smallest amount possible (according to what the manufacturer says) so as not to over-fertilize.
On the other hand, you can start by growing the Jack Herer x Super Skunk plants at the beginning of spring indoors and then in mid-spring, take them outdoors where you will appreciate their explosive growth.


